विंडोज़ में सॉफ़्टवेयर कीड़े और त्रुटियों का इतिहास है जो वर्षों से ऑपरेटिंग सिस्टम का पालन कर चुके हैं। विंडोज एक्सपी उपभोक्ताओं और व्यवसायों के साथ समान रूप से लोकप्रिय था, लेकिन ओएस सुरक्षा छेद और बग के लिए जाना जाता था। विंडोज विस्टा माइक्रोसॉफ्ट के लिए एक प्रमुख दृश्य पुनर्विचार था, लेकिन ऑपरेटिंग सिस्टम की आलोचना दोनों तकनीकी पत्रकारों और उपभोक्ताओं द्वारा इसकी गोपनीयता चिंताओं, सुरक्षा छेद और ड्राइवर समर्थन के साथ मुद्दों के लिए की गई थी। जब विंडोज 7 को 200 9 में रिलीज़ किया गया था, तो इसे विस्टा द्वारा बनाई गई फिक्सिंग समस्याओं के रूप में काफी हद तक बेचा गया था, और हालांकि विंडोज 7 की आलोचकों ने काफी हद तक प्रशंसा की थी, लेकिन यह भी आलोचना के अपने उचित हिस्से का अनुभव करता है, खासकर उम्र के रूप में।
विस्टा के साथ विंडोज 7 की तरह, विंडोज 8 पर विंडोज 8 पर गलतियों और आलोचनाओं में सुधार करने के लिए विंडोज 10, छोटे, द्विवार्षिक अपडेट और अनिवार्य सुरक्षा पैच के साथ पूरा करने के लिए कंप्यूटर को रोजमर्रा के उपयोग के दौरान सुरक्षित रखने के लिए मौजूद है। यह कहना एक खिंचाव नहीं है कि विंडोज 10 सबसे अच्छा ऑपरेटिंग सिस्टम है जिसे माइक्रोसॉफ्ट ने कभी भेज दिया है, लेकिन इसका मतलब यह नहीं है कि सुधार के लिए जगह नहीं है। किसी अन्य ऑपरेटिंग सिस्टम की तरह, विंडोज 10 समय के साथ धीमा हो सकता है, खासकर जब आप हर दिन अपने कंप्यूटर का उपयोग कर रहे हों।
यह आलेख आपको विंडोज 10 के लिए विभिन्न सुधारों और बदलावों के माध्यम से ले जाएगा, जो आपको अपने सिस्टम को तेज़ी से बढ़ाने और अपने कंप्यूटर को गति तक वापस लाने में मदद कर सकता है। (यदि आप सुनिश्चित नहीं हैं कि आपके पास विंडोज़ का कौन सा संस्करण है, तो हम इसे यहां समझने में आपकी सहायता करेंगे।) आइए विंडोज 10 को तेज करने के लिए इस परम गाइड में देखें।
खराबी फिक्स
यह कोई रहस्य नहीं है कि आपका कंप्यूटर समय के साथ धीमा हो जाता है। चाहे आप विंडोज या मैकोज़ उपयोगकर्ता हों, आप अपने डिवाइस के स्वामित्व के पहले कुछ महीनों में अपने लैपटॉप या डेस्कटॉप को धीमा कर देंगे। जैसे ही आप सॉफ़्टवेयर इंस्टॉल करते हैं, फ़ाइलों को डाउनलोड करते हैं, अपने डिवाइस पर मीडिया और फोटो स्टोर करते हैं, और वेब ब्राउज़ करते हैं, तो आपकी डिवाइस लगातार उन चीजों को करने के लिए अधिक संसाधनों का उपयोग कर रही है जो आपको करने की ज़रूरत है। क्रोम या माइक्रोसॉफ्ट एज में आपके डिवाइस पर अनावश्यक सॉफ़्टवेयर स्थापित करने के लिए बहुत सारे टैब खोलने से सबकुछ इसे धीमा करने में योगदान दे सकता है। हालांकि, ये आपके दैनिक उपयोग में कुछ सुंदर मानक हिचकी हैं, लेकिन हमने विंडोज 10 उपयोगकर्ताओं के लिए सिरदर्द के कारण कई त्रुटियों को भी देखा है। यदि आपका कंप्यूटर धीरे-धीरे धीरे-धीरे चल रहा है, तो इन समाधानों में से कुछ को देखने के लायक हो सकता है कि यह देखने के लिए कि आपका डिवाइस अधिक अच्छे-ट्यूनिंग ट्वीक्स पर जाने से पहले अच्छा आकार में है या नहीं।
हार्ड ड्राइव समस्याएं
यदि आपके कंप्यूटर के साथ बड़ी गति समस्याएं हैं, तो उन चीजों में से एक जो आप पहले जांचना चाहते हैं वह आपके हार्ड ड्राइव का स्वास्थ्य है। हार्ड ड्राइव (या एचडीडी) आपके कंप्यूटर पर सबकुछ के लिए भंडारण स्थान है, आपकी फाइलों, फ़ोटो और दस्तावेजों से ऑपरेटिंग सिस्टम में ही। परंपरागत रूप से, हार्ड ड्राइव हार्डवेयर के डिस्क-आधारित टुकड़े होते हैं जो आपके कंप्यूटर के लिए डिजिटल जानकारी को बनाए रखने के लिए चुंबकीय भंडारण का उपयोग करते हैं, हालांकि एसएसडी (ठोस-राज्य ड्राइव), जिसमें यांत्रिक भागों की कमी होती है और आपके स्मार्टफ़ोन के समान फ्लैश-आधारित स्टोरेज का उपयोग होता है, कीमतों को कम करने और पारंपरिक हार्ड ड्राइव पर बढ़ी हुई गति के कारण अधिक से अधिक लोकप्रिय हो रहा है।
आपकी हार्ड ड्राइव आपके कंप्यूटर में सबसे महत्वपूर्ण घटकों में से एक है - एक स्वस्थ, अच्छी तरह से काम करने वाली हार्ड ड्राइव के बिना, आपका कंप्यूटर क्रॉल में धीमा हो सकता है। अपने हार्ड ड्राइव को उसी तरह से प्रबंधित करना महत्वपूर्ण है जिससे आप अपना घर या अपार्टमेंट साफ कर सकें। पुरानी फाइलों, फ़ोल्डरों और सॉफ़्टवेयर, हटाने, अनइंस्टॉल करने और जहां आवश्यक हो वहां संग्रह करने के लिए कुछ घंटों को अलग करना, कंप्यूटर को फिर से नया महसूस कर सकता है। ऐसा करने का सबसे आसान तरीका यह है कि विंडोज 10 पर अपना फाइल एक्सप्लोरर खोलें, फोल्डर को फ़ोल्डर को हटाने और सॉफ़्टवेयर संग्रहित करने के लिए फ़ोल्डर में जा रहा है। हम समय-समय पर बनाए गए किसी भी डेटा को हटाने और हटाने के लिए दस्तावेज़, चित्र, वीडियो और डाउनलोड जैसी आपकी सिस्टम फ़ाइलों से शुरू करने की सलाह देते हैं। न केवल आपके हार्ड ड्राइव पर अंतरिक्ष के मुक्त गीगाबाइट्स, यह आपकी गति भी बढ़ा सकता है।
एक और उत्कृष्ट विचार है कि बाहरी यूएसबी-आधारित हार्ड ड्राइव पर दैनिक आधार पर आवश्यक फ़ाइलों और फ़ोल्डरों को संग्रहित करना। टेराबाइट हार्ड ड्राइव $ 60 से कम के लिए अमेज़ॅन पर पाई जा सकती है, जिससे उन्हें एक नया डिवाइस खरीदने के बिना अपने कंप्यूटर को तेज करने के लिए उपयोगकर्ताओं के लिए एक बड़ा निवेश मिल सकता है।

आप मानक डिस्क ड्राइव के स्वास्थ्य को जांचने के लिए एक आसान तरीका के लिए डिस्क मॉनीटर का भी उपयोग कर सकते हैं। हमारी अनुशंसित डिस्क मॉनीटर WinDirStat है, जो आपके हार्ड ड्राइव स्टोरेज स्पेस का विश्लेषण करने और आपके हार्ड ड्राइव की स्थिति के बारे में स्मार्ट निर्णय लेने के लिए एक उपकरण है। मुफ्त सॉफ्टवेयर रंगीन श्रेणी वाले बक्से में क्रमबद्ध प्रत्येक फ़ाइल और फ़ोल्डर के साथ, आपके ड्राइव पर क्या है, यह देखने का एक दृश्य तरीका प्रदान करता है।
WinDirStat इंस्टॉल करने पर, आपसे पूछा जाएगा कि आप कौन सी ड्राइव ऐप में देखना चाहते हैं (यदि आपके पास एकाधिक ड्राइव हैं, तो यह है)। आप एक ही समय में सभी ड्राइव देख सकते हैं या देखने के लिए कुछ ड्राइव का चयन कर सकते हैं। प्रत्येक फ़ाइल प्रकार का अपना संबंधित रंग होता है जिसका उपयोग आप अपने प्रदर्शन पर ब्लॉक तक मिलान करने के लिए कर सकते हैं। मानचित्र के लिए कुंजी आपके प्रदर्शन के ऊपरी-दाएं कोने में प्रदर्शित होती है, जिससे यह बताना आसान हो जाता है कि आपके फ़ाइल सिस्टम में क्या है।
प्रत्येक ब्लॉक पर रोलिंग एप्लिकेशन के निचले हिस्से में फ़ाइल नाम प्रदर्शित करेगी, जबकि ब्लॉक चुनने से आप अपने फ़ाइल ब्राउज़र में फ़ाइल तक पहुंच सकते हैं। आप WinDirStat से या तो रीसायकल बिन या स्थायी रूप से फ़ाइल या फ़ोल्डर को हटा सकते हैं। जैसे ही आप अपना ड्राइव साफ़ करते हैं, आपको पुरानी ड्राइव से कुछ गति प्राप्त करने में सक्षम होना चाहिए, हालांकि याद रखें कि ड्राइव उनकी सामान्य सेट गति से तेज़ी से नहीं जा सकती हैं। उदाहरण के लिए, एक पुराना 5400 आरपीएम ड्राइव 7200 आरपीएम ड्राइव की गति से मेल नहीं खा रहा है, और एसएसडी के साथ प्रतिस्पर्धा करने के करीब कभी नहीं आएगा।

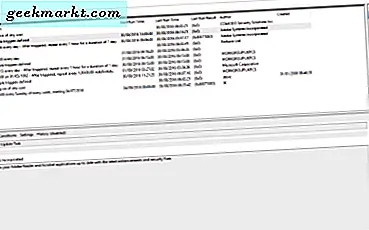
यदि आप अपने हार्ड ड्राइव के स्वास्थ्य की निगरानी करने के लिए कुछ ढूंढ रहे हैं, तो सुनिश्चित करें कि आप जानते हैं कि आपका कंप्यूटर कब बाहर निकल रहा है, आप पासमार्क डिस्क चेकआउट, एक उपयोगिता जो उपभोक्ताओं के लिए नि: शुल्क है और व्यवसाय लाइसेंस के लिए $ 19.99 खर्च कर सकते हैं। एप्लिकेशन स्वयं ही मूलभूत है, लेकिन इसका उपयोग करके आपकी फाइलें, फोटो और संगीत संग्रह को सहेजने और सबकुछ खोने के बीच अंतर हो सकता है क्योंकि आप मरने वाली हार्ड ड्राइव को पहचानने में असफल रहे। बस एप्लिकेशन को बूट करें, मुख्य मेनू से अपना ड्राइव चुनें, और अपने ड्राइव के बारे में प्रदान की गई मूलभूत जानकारी देखें। PassMark उसी SMART सिस्टम का उपयोग करता है जो हार्ड ड्राइव को असफल होने पर पहचानने की अनुमति देता है, इसलिए यदि आपके ड्राइव की स्थिति अप्रत्याशित रूप से बदल जाती है तो आपको एक चेतावनी प्राप्त होगी। डिस्क चेकआउट का उपयोग करके, आप अपने ड्राइव के वर्तमान पढ़ने और लिखने की गति, अपनी औसत डिस्क विलंबता और ड्राइव द्वारा प्रदान की गई स्मार्ट जानकारी देख सकते हैं। अंत में, ऐप के अंदर कॉन्फ़िगरेशन सेटिंग्स का उपयोग करके, आप अपने हार्ड ड्राइव के स्वास्थ्य के लिए डेस्कटॉप नोटिफिकेशन और ईमेल नोटिफिकेशन दोनों सेट अप कर सकते हैं।
मैलवेयर
हालांकि ज्यादातर लोग सभी कंप्यूटर वायरस के बारे में सोचते हैं, लेकिन वास्तव में यह शब्द खतरनाक सॉफ़्टवेयर का वर्णन करने के लिए एक पकड़ है जो आपके कंप्यूटर को संक्रमित करता है। वायरस की कई अलग-अलग किस्में हैं, जिनमें से प्रत्येक आपके सिस्टम पर हमला करने का अपना व्यक्तिगत तरीका है, लेकिन अब तक की सबसे आम किस्म मैलवेयर है। जब आप पारंपरिक कंप्यूटर वायरस के बारे में सोचते हैं, तो आप शायद मैलवेयर, या दुर्भावनापूर्ण सॉफ़्टवेयर, कंप्यूटर और अन्य कंप्यूटिंग सिस्टम को नुकसान पहुंचाने या अक्षम करने के लिए डिज़ाइन किए गए प्रोग्राम के बारे में सोच रहे हैं। मैलवेयर स्वयं छतरी शब्द का थोड़ा सा है, लेकिन आपको यह जानने की जरूरत है कि: आपके सिस्टम को मैलवेयर से संक्रमित किया जा सकता है, बिना किसी कार्रवाई के आपके लिए आवश्यक कार्रवाई, आमतौर पर खतरनाक निष्पादन योग्य फ़ाइल के माध्यम से फैलती है। हालांकि निष्पादन योग्य फ़ाइलें (फ़ाइल एक्सटेंशन .exe के साथ चिह्नित) विंडोज़ दुनिया में एक आवश्यकता है (लगभग हर प्रोग्राम और आपके मशीन पर एप्लिकेशन इंस्टॉल करने के लिए उपयोग की जाती है), एक खतरनाक .exe फ़ाइल आपके कंप्यूटर के लिए परेशानी का जादू कर सकती है।

हालांकि मूल प्रकार का मैलवेयर आपके कंप्यूटर पर सामान्य प्रक्रियाओं को अक्षम या दूषित करता है, लेकिन मैलवेयर के बहुत से विशिष्ट "स्वाद" हैं जो आपके कंप्यूटर को विभिन्न तरीकों से नुकसान पहुंचाते हैं, जिनमें निम्न शामिल हैं:
- ट्रोजन हॉर्स: लकड़ी के घोड़े की तरह जो ट्रॉय के पतन की ओर अग्रसर होने में मदद करता है, ट्रोजन आपके सच्चे इरादों के बारे में आपको गुमराह करने के लिए छेड़छाड़ किए गए सॉफ़्टवेयर के टुकड़े हैं, बल्कि उपयोगकर्ता को यह विश्वास दिलाता है कि यह सॉफ्टवेयर का वास्तविक टुकड़ा है। एक बार यह आपके कंप्यूटर को संक्रमित कर लेने के बाद, ट्रोजन सभी प्रकार की बुरी चीजें कर सकते हैं, जिसमें आपके एंटीवायरस को अक्षम करना, अपनी बैंक जानकारी चोरी करना हैकर को अपने पासवर्ड भेजना, साझा आईपी पते पर उपयोगकर्ताओं को संक्रमित करना आदि। वे सबसे खतरनाक प्रकार के वायरस में से एक हैं- लेकिन सौभाग्य से, उन्हें खोलने से पहले अपनी .exe फ़ाइलों को सत्यापित करके आसानी से बचा जा सकता है, साथ ही साथ संदेहजनक ईमेल में .exe फ़ाइल अनुलग्नकों से परहेज कर सकते हैं।
- Ransomware: मैलवेयर की एक और लोकप्रिय किस्म, ransomware इन दिनों अधिक लोकप्रिय हो रही है, पुराने ऑपरेटिंग सिस्टम पर कई उच्च प्रोफ़ाइल हमलों के साथ पूरे 2017 में हो रहा है। अन्य मैलवेयर के विपरीत, जो फैलाने और व्यवधान और समस्याओं को बनाने के लिए मौजूद है, ransomware बिल्कुल ठीक है नाम का क्या अर्थ है: यह आपके कंप्यूटर को अनलॉक करने के लिए छुड़ौती मांगता है। आधुनिक ransomware में, इस खंड को आम तौर पर बिटकॉइन के रूप में पूछा जाता है, एक डिजिटल क्रिप्टोकुरेंसी, जो लेखन के रूप में, वर्तमान में एक बिटकोइन $ 4, 000 से अधिक के बराबर होती है।
- स्पाइवेयर: यह मैलवेयर मुख्य रूप से संक्रमित उपयोगकर्ता पर जासूसी करने, आपके ब्राउज़िंग इतिहास, पासवर्ड, बैंक जानकारी आदि सहित व्यक्तिगत और निजी जानकारी एकत्र करने के लिए मौजूद है। स्पाइवेयर में अक्सर एक कीलॉगर, सॉफ़्टवेयर का एक टुकड़ा शामिल होता है जो सीधे आपके कंप्यूटर पर टाइप किए गए ट्रैक को ट्रैक करता है और इसे किसी अन्य बाहरी स्रोत पर भेजता है।
- एडवेयर: एडवेयर आवश्यक मैलवेयर नहीं है; एडवेयर के बहुत से दोस्ताना और सुरक्षित टुकड़े मौजूद हैं, जिनमें स्काइप, या किसी अन्य सॉफ़्टवेयर सूट जैसे एप्लिकेशन शामिल हैं जो एम्बेडेड विज्ञापनों को सॉफ़्टवेयर स्वामी के पैसे कमाने के तरीके के रूप में दिखाते हैं। कंप्यूटर स्वामी की सहमति के बिना इंस्टॉल होने के बाद एडवेयर मैलवेयर बन जाता है, इस प्रकार ऐसी स्थिति पैदा होती है जहां कंप्यूटर मालिक को विज्ञापन दिखाया जा रहा है और स्पष्ट अनुमति दिए बिना कंपनी के लिए पैसे कमाने के लिए उपयोग किया जा रहा है। एडवेयर अक्सर ransomware और स्पाइवेयर सहित मैलवेयर के अन्य रूपों में morph कर सकते हैं।
- कीड़े: अन्य मैलवेयर के विपरीत, कीड़े मुख्य रूप से अन्य कंप्यूटरों और कंप्यूटर सिस्टम में फैलाने के लिए मौजूद होते हैं, अक्सर उपकरणों के साझा नेटवर्क पर। कीड़े आम तौर पर कंप्यूटर के बैंडविड्थ उपभोग करने सहित कंप्यूटर को संक्रमित करने के लिए कुछ नुकसान पहुंचाते हैं। इन्हें आम तौर पर एक मजबूत पासवर्ड और सुरक्षा प्रणाली से पराजित किया जा सकता है।
- Scareware: जैसा कि नाम का तात्पर्य है, स्कायरवेयर मुख्य रूप से उपयोगकर्ता को डरपोक करने या घुसपैठ करने के कारण होता है, अक्सर उपयोगकर्ता को अवांछित और महंगी सॉफ्टवेयर खरीदने के लिए प्रेरित करता है। यह अक्सर पॉपअप संदेशों के माध्यम से उपयोगकर्ता को बताता है कि वे सॉफ़्टवेयर से संक्रमित हैं, या एफबीआई ने अपने इंटरनेट उपयोग को ट्रैक किया है और उपयोगकर्ता को खतरनाक समझा है। स्केवेयरवेयर रणनीति के माध्यम से उपयोगकर्ता द्वारा खरीदा गया सॉफ़्टवेयर अक्सर उपयोगकर्ता के कंप्यूटर को किसी अन्य प्रकार के मैलवेयर से संक्रमित करता है।
हालांकि यह आपके कंप्यूटर और वेब को खतरनाक बना सकता है, यह भी याद रखना महत्वपूर्ण है कि ऑपरेटिंग सिस्टम पहले से कहीं अधिक सुरक्षित हैं। यद्यपि इस तरह के कई प्रकार के मैलवेयर आज भी वेब पर मौजूद हैं, विंडोज 10 एक्सपी के शासनकाल के बाद से विंडोज़ XP के किसी भी संस्करण की तुलना में कहीं अधिक सुरक्षित है, क्योंकि इनमें से अधिकतर वायरस की लोकप्रियता समाप्त हो गई है। यहां तक कि इस साल का सबसे बड़ा मैलवेयर हमला, वानाक्रिया रांसोमवेयर जिसने अस्पतालों जैसे व्यवसायों को अपने कंप्यूटर को अनलॉक करने के लिए भुगतान करने के लिए कहा, ज्यादातर विंडोज 7 चलाने वाले कंप्यूटर पर हमला किया, विंडोज 10 कंप्यूटर पर हमला सिस्टम के 0.03 के लिए लेखांकन।

फिर भी, आपको अपने कंप्यूटर पर एंटीमाइवेयर और एंटीवायरस सॉफ़्टवेयर सूट चलाकर हमलावरों के खिलाफ खुद को बचाने की आवश्यकता है। हालांकि, सॉफ़्टवेयर के इन टुकड़ों के साथ सबसे बड़ी समस्या बग्गी, असंगत और महंगी होने के लिए उनकी कुख्यात है। कई कंप्यूटर जैसे अमेज़ॅन या बेस्ट बाय जहाज जैसे नॉर्टन और मैकएफ़ी एंटीवायरस जैसे सॉफ़्टवेयर के परीक्षण संस्करणों से खरीदे गए हैं, जो अक्सर आपके कंप्यूटर पर चलने वाले कुछ निश्चित समय के बाद समाप्त हो जाते हैं। आपको अपने डेस्कटॉप या लैपटॉप को खतरनाक सॉफ़्टवेयर से बचाने के लिए इस सॉफ़्टवेयर के लिए भुगतान करने की आवश्यकता नहीं है- ऊपर वर्णित जैसा मैलवेयर से आपकी सुरक्षा के लिए मौजूद बाजार पर सॉफ़्टवेयर के बहुत सारे मुफ्त टुकड़े मौजूद हैं। यहां हमारी कुछ शीर्ष चुनौतियां दी गई हैं:
- विंडोज डिफेंडर (या विंडोज 10 डिज़ाइनर अपडेट में विंडोज डिफेंडर एंटीवायरस): विंडोज 8 के बाद से, इस सॉफ़्टवेयर सूट को विंडोज़ में डिफॉल्ट रूप से शामिल किया गया है, जो सभी विंडोज उपयोगकर्ताओं को सॉफ्टवेयर के खतरनाक टुकड़ों से अपेक्षाकृत सुरक्षित रखता है। हालांकि यह एक सक्षम एंटीवायरस है, यह उतना ही मजबूत नहीं है जितना हमने बाहरी कंपनियों से देखा है। उन्नत उपयोगकर्ता शायद बाहरी सॉफ़्टवेयर के खिलाफ अपनी मूल रक्षा के रूप में इसके साथ रह सकते हैं, लेकिन अधिकांश उपयोगकर्ता किसी तृतीय-पक्ष सूट में अपग्रेड करना चाहते हैं।
- अवास्ट! नि: शुल्क एंटीवायरस 2017: यह एंटीवायरस सॉफ़्टवेयर के लिए हमारा शीर्ष चयन है, क्योंकि इसकी स्थिति एक नि: शुल्क सुरक्षा सूट के रूप में है, जबकि अभी भी तेज़ और त्वरित शेष है, इसे कुछ अनपेक्षित एंटीवायरस ऐप्स में से एक के रूप में डाउनलोड करने के लायक है। अवास्ट के भुगतान संस्करण हैं जिन्हें आप अपग्रेड कर सकते हैं, लेकिन आपको उनकी आवश्यकता नहीं है-अवास्ट डाउनलोड करें! नि: शुल्क, इसे सेट अप करें, क्रोम के लिए अपने टूलबार से ऑप्ट आउट करें, और इसे अपने कंप्यूटर की पृष्ठभूमि में चलाने की अनुमति दें। अगर आपने अवास्ट की कोशिश की है! और आपको यह पसंद नहीं है, अवीरा और एवीजी दोनों उत्कृष्ट एंटीवायरस सूट भी मुफ्त में प्रदान करते हैं।
- मैलवेयरबाइट्स: अवास्ट! अपने कंप्यूटर का उपयोग करते हुए अधिकांश वायरस और अन्य खतरनाक घटकों को कवर करता है, यह अभी भी एक समर्पित एंटी-मैलवेयर प्रोग्राम की तलाश में लायक है, और मैलवेयरबाइट्स फ्री से कुछ भी बेहतर नहीं है, जो आपको अपने कंप्यूटर पर मैलवेयर का पता लगाने और निकालने में मदद करता है।

हम आपके कंप्यूटर पर एंटीवायरस और एंटी-मैलवेयर प्रोग्राम दोनों का उपयोग करने की सलाह देते हैं, क्योंकि दोनों टूल अन्य की कमियों के लिए तैयार होते हैं। हालांकि, सावधान रहें सुरक्षा सॉफ्टवेयर के बहुत सारे टुकड़े स्थापित न करें; वे अक्सर एक दूसरे की कार्रवाई को दुर्भावनापूर्ण गतिविधि के रूप में उठाते हैं, जो आपके पीसी को क्रॉल में धीमा कर सकता है। यह सुनिश्चित करना सुनिश्चित करें कि आपके प्रोग्राम एक ही कंप्यूटर पर एक ही समय में स्थापित करने से पहले एक दूसरे के साथ संगत हैं।
इनमें से अधिकतर कार्यक्रम, जिनमें हमने ऊपर अनुशंसित किया है, आपके कंप्यूटर की पृष्ठभूमि में किसी भी प्रमुख संकेत या कार्रवाई के बिना काम करते हैं, आमतौर पर आपके कंप्यूटर पर एक स्कैन पूरा होने पर आपको अधिसूचना के साथ सतर्क करते हुए, एक रिपोर्ट के साथ किसी भी पाए गए खतरे यदि आपके सॉफ़्टवेयर को कुछ भी मिल रहा है, तो आपको अपने एंटीवायरस या एंटी-मैलवेयर के अंतर्निहित हटाने उपकरण का उपयोग करके इसे निकालने के लिए कहा जाएगा, जिससे आपके कंप्यूटर से खराब या अवांछित सॉफ़्टवेयर प्राप्त करना आसान हो जाएगा और इसे एक बार गति में वापस लेना आसान हो जाएगा। अधिक।
दोषपूर्ण राम
जबकि आपके हार्ड ड्राइव आपके कंप्यूटर पर खोलने से एप्लिकेशन को धीमा करने के लिए ज़िम्मेदार हो सकते हैं, आपकी रैम (या यादृच्छिक-एक्सेस मेमोरी) की समस्याएं हालिया और अस्थायी डेटा को संग्रहीत करने के साथ समस्याएं पैदा कर सकती हैं, जिससे गति के साथ समस्याएं भी उत्पन्न हो सकती हैं। यदि आपका कंप्यूटर धीमा होने लगता है जैसे दिन चल रहा है, तो यह एक दोषपूर्ण रैम स्टिक का कारण हो सकता है, जो आपके कंप्यूटर को क्रैश, पुनरारंभ करने या नीली स्क्रीन त्रुटि संदेशों को भी उत्पन्न कर सकता है। सौभाग्य से, विंडोज 10 मेमोरी डायग्नोस्टिक टूल का उपयोग आपकी रैम की स्थिति की जांच के लिए किया जा सकता है। इसका उपयोग करने के लिए, रन खोलने के लिए विन + आर दबाएं, "mdsched.exe" टाइप करें (या कॉपी करें और पेस्ट करें), और एंटर दबाएं। आपके कंप्यूटर का मेमोरी डायग्नोस्टिक टूल लोड हो जाएगा, और आप या तो एप्लिकेशन का तुरंत उपयोग कर सकते हैं (आपके कंप्यूटर को पुनरारंभ करने के कारण), या अगली बार जब आप अपना कंप्यूटर शुरू करेंगे।

यदि डायग्नोस्टिक्स रीबूट पर आपकी रैम के साथ समस्याएं प्रदर्शित करता है, तो सभी मशीनों के लिए समाधान को पिन करना थोड़ा मुश्किल है। डेस्कटॉप के लिए, समस्या पूरी तरह से असफल नहीं है। डेस्कटॉप खोलना मुश्किल नहीं है (आमतौर पर, आप अपनी मशीन के मदरबोर्ड को प्रकट करने के लिए एक साइड पैनल को अनसुलझा कर देंगे, जहां रैम स्लॉट्स), और ऑनलाइन मशीन के बहुत सारे गाइड हैं जो दिखाते हैं कि आपकी मशीन में रैम को कैसे बदला जाए। प्रतिस्थापन रैम खरीदने के लिए बहुत महंगा नहीं है, और आपके कंप्यूटर में रैम डालना उतना आसान है जितना रैम स्टिक को जगह में दबाया जा सकता है, एक वीडियो गेम कारतूस को एसएनईएस में डालने के समान (हालांकि मदरबोर्ड को ट्रिगर करने के लिए थोड़ा और दबाव आवश्यक है लॉकिंग तंत्र)। रैम आमतौर पर दो छड़ों के पैक में बेचा जाता है, इसलिए आपकी रैम को बदलना या अपग्रेड करना एक ही समय में किया जाना चाहिए।
हालांकि, यदि आप मुख्य कंप्यूटर हैं तो एक लैपटॉप है, चीजें थोड़ा और मुश्किल हो जाती हैं। जबकि कुछ आधुनिक लैपटॉप-विशेष रूप से गेमिंग मशीन और अन्य लैपटॉप पतले और हल्के होने से चिंतित नहीं हैं- उपयोगकर्ताओं को मशीन की रैम तक पहुंचने की इजाजत मिल सकती है, आप यह सुनिश्चित करना चाहते हैं कि आपके लैपटॉप में उपयोगकर्ता के प्रतिस्थापन योग्य या विस्तार योग्य रैम आपके नीचे के नीचे खुलने से पहले लैपटॉप। कई मामलों में, आप यह सुनिश्चित करना चाहते हैं कि आपका लैपटॉप खोलकर आपकी वारंटी रद्द नहीं की जाएगी। इसके अलावा, यदि आप एक अल्टरबूक-स्टाइल मशीन के मालिक होने के नाते होते हैं, तो आपको लगता है कि रैम को डिवाइस के अंदर मदरबोर्ड में बेचा गया है। उस स्थिति में, आपको अपने लैपटॉप के लिए सेवा की व्यवस्था करने के लिए अपने डिवाइस के निर्माता से संपर्क करने की आवश्यकता होगी।
अधिक गर्म
यह मूल प्रतीत हो सकता है, लेकिन कंप्यूटर बहुत गर्म तापमान पर चलते हैं। आपके पीसी का सीपीयू आमतौर पर लगभग 45 से 50 डिग्री सेल्सियस (113 से 122 डिग्री फ़ारेनहाइट) पर चलता है, कभी-कभी अधिकतम तापमान 60 डिग्री सेल्सियस तक पहुंच जाता है। यदि आपके कंप्यूटर में एक समर्पित जीपीयू है, तो संभवत: आपके कंप्यूटर को क्षति से बचने के लिए बंद होने से पहले, लोड के तहत 60 से 85 डिग्री सेल्सियस तक और अधिकतम तापमान तक पहुंचने के लिए अधिकतम तापमान भी दिखाई देगा। यही कारण है कि उच्च अंत मशीनों पर शीतलन इतना महत्वपूर्ण है। डेस्कटॉप पर, कूलर मास्टर जैसी कंपनियों से समर्पित सीपीयू कूलर आमतौर पर अनुशंसित होते हैं, और कुछ पावर उपयोगकर्ता अपने स्वयं के निर्मित सिस्टम को प्रबंधित करने के लिए तरल ठंडा करने के लिए स्विच कर चुके हैं। लैपटॉप पर, आप अक्सर वर्तमान और पुराने गेमिंग लैपटॉप में प्रशंसकों के शोर स्तर के बारे में शिकायतें देखेंगे, खासतौर पर पतलेपन पर केंद्रित हैं, लेकिन सिस्टम के लिए ऐसे शक्तिशाली हार्डवेयर को चलाने की आवश्यकता है।
उस ने कहा, यदि आपका कंप्यूटर लगातार एयरफ्लो या खराब शीतलन स्थितियों के कारण लगातार गरम हो रहा है, तो आप यह सुनिश्चित करना चाहते हैं कि आपका कंप्यूटर अभी भी उचित तापमान पर चल रहा है। दुर्भाग्यवश, यह किसी अन्य चीज का एक और उदाहरण है जो किसी लैपटॉप से डेस्कटॉप पर प्रबंधित करना आसान है, लेकिन ध्यान दिए बिना, यह दोनों प्रकार के कंप्यूटरों पर संभव है।
डेस्कटॉप के लिए, बंद करें और अपने डिवाइस को अनप्लग करें और मशीन के इंटीरियर को प्रकट करने के लिए अपनी मशीन से साइड पैनल ले कर शुरू करें। ब्रश और संपीड़ित हवा के संयोजन का उपयोग करके, मशीन के माध्यम से सावधानीपूर्वक सफाई के माध्यम से अपना रास्ता बनाओ। मशीन से धूल को उड़ाने के लिए संपीड़ित हवा का उपयोग करके प्रशंसकों और कूलर को साफ किया जा सकता है, हालांकि सुनिश्चित करें कि आप मदरबोर्ड या अन्य घटकों पर संपीड़ित हवा को छिड़का नहीं रहे हैं। प्रशंसकों के माध्यम से उड़ा देना ऐसा करने का सबसे आसान तरीका है; वैकल्पिक रूप से, यदि आपके पास पीसी बनाने में अनुभव है, तो आप उन्हें साफ करने के लिए अपने पीसी से घटकों को एक-एक करके हटा सकते हैं। उन क्षेत्रों पर जहां आप संपीड़ित हवा के साथ धूल को हटा नहीं सकते हैं, ब्रश चाल करेगा।

डेस्कटॉप कंप्यूटर में प्रशंसकों को प्रतिस्थापित करने की क्षमता भी होती है यदि आपका कंप्यूटर ठीक से ठंडा नहीं किया जा रहा है। प्रशंसकों को सीधे पावर के लिए मदरबोर्ड में प्लग करें, और आप $ 30 या $ 40 ऑनलाइन के लिए प्रशंसकों की एक ठोस जोड़ी खरीद सकते हैं। आप यह सुनिश्चित करना चाहते हैं कि आप उत्पाद खरीदने से पहले आवश्यक प्रशंसक के आकार की खोज करें, लेकिन अन्यथा, अपने प्रशंसकों को डेस्कटॉप में बदलना एक अच्छा, सस्ता तरीका है जिससे आपका डिवाइस ठंडा रहता है। अंत में, सुनिश्चित करें कि आपके जीपीयू के प्रशंसकों सक्रिय और काम कर रहे हैं; एक अति तापकारी जीपीयू ग्राफिक्स त्रुटियों का कारण बन सकता है, जिसके परिणामस्वरूप आपकी मशीन के लिए मजबूर पुनरारंभ होता है। एनवीआईडीआईए और एएमडी दोनों में आपके जीपीयू के प्रशंसकों को मैन्युअल रूप से नियंत्रित करने के लिए अंतर्निहित सॉफ्टवेयर है, और जीपीयू-जेड विंडोज के लिए एक नि: शुल्क प्रोग्राम है जो आपके ग्राफिक्स कार्ड को मैन्युअल रूप से सेट गति पर भी नियंत्रित कर सकता है।
लैपटॉप के लिए, मशीन को वास्तव में साफ करना थोड़ा मुश्किल है। यदि आपका डिवाइस इसके लिए अनुमति देता है, तो आप वेंटिलेशन वेंट्स को जांचने और किसी भी धूल को हटाने के लिए अपने डिवाइस के निचले आवरण को हटाने में सक्षम हो सकते हैं, सावधानीपूर्वक उन्हें संपीड़ित हवा से साफ कर सकते हैं। सीपीयू को अधिकांश आधुनिक मशीनों में शामिल किया जाना चाहिए, जिसका अर्थ है खतरनाक तत्वों को महत्वपूर्ण घटकों को गलती से उजागर करने का जोखिम। लैपटॉप के साथ, यह भी सुनिश्चित करना महत्वपूर्ण है कि आप vents को अवरुद्ध नहीं कर रहे हैं; यह विशेष रूप से गेमिंग लैपटॉप के लिए जाता है। यदि आप कालीन या कपड़े पर अपनी मशीन का उपयोग कर रहे हैं, तो डिवाइस के लिए कुछ प्रकार के स्टैंड में निवेश करें जो मशीन को बंद-बंद वायुमार्ग से रोक देगा।
अपने कंप्यूटर का उन्नयन
एक बार जब आप सुनिश्चित कर लें कि आपका कंप्यूटर अच्छी तरह से ठंडा है, मैलवेयर और अन्य खतरनाक सॉफ़्टवेयर के खिलाफ सुरक्षित है, और क्षतिग्रस्त हार्डवेयर का अनुभव नहीं हुआ है, तो यह समय आपके पीसी के संभावित उन्नयन पर विचार करने का समय है। डेस्कटॉप आमतौर पर अपग्रेड करना आसान होता है; यह टावर के किनारे को हटाने और आपके कंप्यूटर के मदरबोर्ड में प्लग किए गए हिस्सों और तारों में हेरफेर करने का मामला है। लैपटॉप कुछ हद तक अपग्रेड करने योग्य भी हो सकते हैं। कुछ लैपटॉप, विशेष रूप से गेमिंग या सामग्री निर्माण पर केंद्रित, लैपटॉप के निचले पैनल को हटाकर उपयोगकर्ता द्वारा आपके विशिष्ट हार्डवेयर को अपग्रेड करने की अनुमति देते हैं (अक्सर, इसका मतलब है कि आपकी वारंटी दुर्भाग्य से हो जाएगी)। हम मुख्य रूप से नीचे डेस्कटॉप पीसी पर ध्यान केंद्रित करेंगे, लेकिन यदि आप लैपटॉप का उपयोग कर रहे हैं, तो यह सुनिश्चित करने के लिए Google को जांचना सुनिश्चित करें कि आपका कंप्यूटर किसी भी प्रकार के अपग्रेड का समर्थन करता है या नहीं। जबकि आप अपने लैपटॉप में एक नया ग्राफिक्स कार्ड या सीपीयू नहीं जोड़ पाएंगे, तो एक अच्छा मौका है कि आप हार्ड ड्राइव को स्विच कर सकते हैं या अपने कंप्यूटर के मेक और मॉडल के आधार पर रैम को अपग्रेड कर सकते हैं। आएँ शुरू करें।
अधिक रैम
कंप्यूटर को तेज़ करने की कोशिश करते समय अपने पीसी पर अपग्रेड करने पर विचार करने वाली पहली चीज़ों में से एक अतिरिक्त रैम, या यादृच्छिक एक्सेस मेमोरी जोड़ रहा है। जैसा कि हमने ऊपर कवर किया है, सुलभ रैम की कमी आपके कंप्यूटर को आपके कंप्यूटर की स्मृति पर रखने के बजाए अपनी हार्ड ड्राइव से लगातार उपयोग की जाने वाली जानकारी, फ़ाइलों और सॉफ़्टवेयर को लोड करने के लिए मजबूर करती है। इसका मतलब है कि आपके कंप्यूटर पर सबकुछ, विशेष रूप से जो सामान आप अक्सर उपयोग करते हैं, धीमे और अनुत्तरदायी महसूस करेंगे। अधिकांश कंप्यूटरों के लिए विंडोज 10 में न्यूनतम 2 जीबी रैम की आवश्यकता है, लेकिन वास्तव में, आप कम से कम 4 जीबी और अधिक पसंद करेंगे, आपके पीसी को पावर करने के लिए एक पूर्ण 8 गीगाबाइट। 2017 में, एप्लिकेशन और ऑपरेटिंग सिस्टम पहले की तुलना में अधिक स्मृति-भूख बन गए हैं। इस बिंदु पर आपके फोन की संभावना 3 या 4 जीबी रैम भी है। अधिकांश उपयोगकर्ताओं को रोजाना उपयोग के लिए 8 जीबी या रैम की आवश्यकता नहीं होगी, लेकिन यदि आप भविष्य में भविष्य में प्रूफिंग के बारे में चिंतित हैं, तो 16 जीबी उपयोगकर्ताओं के 90 प्रतिशत के लिए बहुत कुछ है। सामग्री निर्माता न्यूनतम 16 जीबी रैम को देखना चाहते हैं, और 32 जीबी तक बढ़ने पर विचार करना चाहेंगे।

यदि आप सुनिश्चित नहीं हैं कि वर्तमान में आपके पीसी में कितनी रैम बनाई गई है, तो बहुत अधिक तनाव न करें। अपने प्रदर्शन के निचले बाएं कोने में स्टार्ट मेनू आइकन पर क्लिक करके प्रारंभ करें और "रैम" टाइप करें, फिर अपनी सिस्टम सेटिंग्स लोड करने के लिए "राम जानकारी देखें" पर क्लिक करें। यह सेटिंग पृष्ठ आपके कंप्यूटर के बारे में अन्य मूलभूत जानकारी के साथ-साथ आपके पीसी में रैम की मात्रा प्रदर्शित करेगा। वैकल्पिक रूप से, आप अपने कंप्यूटर पर टास्क मैनेजर भी खोल सकते हैं। Ctrl + Alt + को दबाएं और दबाएं और "प्रदर्शन" टैब पर टैप करें, फिर बाईं ओर "मेमोरी" चुनें। यह आपके मेमोरी उपयोग का वास्तविक समय चार्ट प्रदर्शित करेगा। यदि आपका उपयोग अक्सर ग्राफ के शीर्ष पर लगातार चार्टिंग होता है, तो आप अपनी मशीन में रैम की मात्रा बढ़ाने पर विचार करना चाहेंगे। यदि आपने पहले कभी कंप्यूटर को अपग्रेड नहीं किया है, तो आपको यह जानकर ख़ुशी होगी कि यह सस्ती है (आमतौर पर $ 150 के तहत ताजा 16 जीबी रैम में अपग्रेड करने के लिए) और एक पीसी में स्थापित करने के लिए सबसे आसान अपग्रेड में से एक है।
- 4 जीबी: यह किसी भी आधुनिक कंप्यूटर को शक्ति देने के लिए उपयोग की जाने वाली बेयरबोन राशि है। वेब ब्राउज़ करने, दस्तावेज़ लिखने और फिल्में देखने के लिए किसी भी व्यक्ति के लिए 4 जीबी उपयोगी है। 4 जीबी कुछ मूल फोटो हेरफेर के लिए भी अनुमति देगा, हालांकि यहां कुछ भी पागल होने की उम्मीद नहीं है। अंत में, यदि आप किसी भी बड़े मल्टीटास्किंग करने की उम्मीद कर रहे हैं, तो आप रैम के उच्च स्तर तक पहुंचना चाहेंगे। ब्राउज़र में एक बार में कई टैब खोलने के लिए भी (विशेष रूप से क्रोम, जो बहुत मेमोरी का उपयोग करता है) आपके कंप्यूटर को क्रॉल में धीमा कर देगा।
- 8 जीबी: अधिकांश आधुनिक उपयोगकर्ताओं के लिए मीठा स्थान, 8 जीबी मूल्य और उपयोगिता का एक अच्छा मिश्रण दर्शाता है। आप सब कुछ कर सकते हैं 4 जीबी आपको, लेकिन थोड़ा तेज़ और चिकनी करने की अनुमति देता है। नेटफ्लिक्स देखें और एक ही समय में वेब ब्राउज़ करें, जबकि दर्जनों टैब खोलें। वीडियो चैट करें और एक साथ फिल्म देखें। पहले की तुलना में अधिक तस्वीरें संपादित करें। 8 जीबी रैम आपको कुछ गेम खेलने की इजाजत देता है, हालांकि ध्यान रखें कि गेम खेलने की आपकी क्षमता भी आपकी मशीन के अंदर आपके जीपीयू और सीपीयू दोनों पर निर्भर करती है।
- 16 जीबी: उपयोगकर्ताओं को अपग्रेड करने के लिए, यह रैम की हमारी अनुशंसित आवंटन है। 16 जीबी मूल रूप से गारंटी देता है कि आप अपने पीसी के साथ कुछ भी करना चाहते हैं। बहु कार्यण? कोई बात नहीं। वर्तमान दिन के खेल? उन्हें एक चैंप की तरह संभालती है। एडोब प्रीमियर प्रो या प्रभाव के बाद अनुप्रयोगों में वीडियो उत्पादन? आप जाने के लिए अच्छा होगा। मूल उपभोक्ता भविष्य में आपके कंप्यूटर को प्रमाणित करने के लिए, इस स्तर पर भी विचार करना चाहेंगे। यदि आप जितनी देर तक अपने कंप्यूटर पर लटका चाहते हैं, तो यह कीमत के लिए सबसे अच्छी राशि है।
- 32 जीबी: यदि आप कुल पावर उपयोगकर्ता हैं, चाहे वह 4 के संपादन, ध्वनि मिश्रण, निरंतर फोटो संपादन और हेरफेर, या पूर्णकालिक गेमर का मास्टर हो, तो आप केवल 32 जीबी रैम तक कूदना चाहेंगे, अगर केवल सुविधा और शक्ति के लिए। 32 जीबी 16 जीबी रैम के रूप में प्रक्रियाओं के समान प्रकार को संभाल सकता है, लेकिन हर कार्रवाई के पीछे थोड़ा अधिक शक्ति के साथ। अधिकांश उपयोगकर्ताओं को 32 जीबी रैम तक कूदने की आवश्यकता नहीं होगी, और यदि आप उस उपयोगकर्ता के प्रकार हैं जिसकी आवश्यकता है, तो आपके पास पहले से ही यह है।
एक चीज जिसे आप अपनी रैम को अपग्रेड करने से पहले विचार करना चाहते हैं वह आपके पीसी के मदरबोर्ड सहित आपके मौजूदा हार्डवेयर द्वारा लगाई गई सीमाएं है। आप यह सुनिश्चित करना चाहते हैं कि आपके कंप्यूटर का मदरबोर्ड आपके पीसी में अतिरिक्त रैम का समर्थन कर सके। सौभाग्य से, क्रेशियल (कंप्यूटर रैम के अग्रणी निर्माताओं में से एक) ने एक टूल विकसित किया है जो आपको अपनी मशीन को तुरंत स्कैन करने और आपके डिवाइस का समर्थन करने वाली उचित मात्रा में रैम सुनिश्चित करने की अनुमति देता है। इसके साथ पालन करने के लिए, अपने पीसी पर क्रेशियल सिस्टम स्कैनर टूल डाउनलोड करने के लिए यहां जाएं। यह आपकी मशीन में रैम स्लॉट की मात्रा के साथ-साथ आपके मदरबोर्ड का समर्थन करने वाली रैम की अधिकतम क्षमता के बारे में जानकारी के लिए स्वचालित रूप से आपके सिस्टम BIOS की जांच करेगा।

एक बार जब आप अपनी मशीन के लिए सही मात्रा में रैम निर्धारित कर लेंगे, तो आप अमेज़ॅन, बेस्ट बाय, न्यूगेग और एनसीईक्स समेत किसी भी वेबसाइट और स्टोर से रैम खरीद सकते हैं। अपनी रैम पर उपयोगकर्ता समीक्षा और अन्य जानकारी के लिए देखें, और अपने प्रकार की मशीनों के लिए निर्माता के गाइड का पालन करें। डेस्कटॉप और लैपटॉप में आमतौर पर अलग-अलग आकार की रैम स्टिक होती है, इसलिए सुनिश्चित करें कि आप अपनी मशीन के लिए सही रैम खरीद रहे हैं। रैम को बदलना या जोड़ना आपके कंप्यूटर के मदरबोर्ड पर मेमोरी स्लॉट में अपनी रैम को स्लाइड करने जितना आसान है। उन लैपटॉप पर जो विस्तारणीय या बदलने योग्य रैम की अनुमति देते हैं, आपको बस इतना करना होगा कि आपकी नई रैम इसी डिब्बे में चिपक जाती है। कुछ लैपटॉप उपयोगकर्ता द्वारा बिल्कुल अपग्रेड नहीं किए जा सकते हैं, इसलिए अधिक जानकारी के लिए अपने निर्माता मार्गदर्शिका से परामर्श लें।
हार्ड ड्राइव
अपने कंप्यूटर की गति और तरलता बढ़ाने के लिए अपनी रैम को अपग्रेड करना महत्वपूर्ण है, खासकर जब यह एकाधिक अनुप्रयोगों, ब्राउज़र टैब और लोडिंग अनुप्रयोगों को जल्दी से चलाने की बात आती है। उस ने कहा, आपके कंप्यूटर में मेमोरी जोड़ने या बदलने से केवल आपके प्रदर्शन को बढ़ावा मिलेगा, खासकर यदि आपका कंप्यूटर आपके हार्ड ड्राइव से एप्लिकेशन या फ़ाइलों को लोड करते समय धीमा हो जाता है। एक नई हार्ड ड्राइव में निवेश करना अधिकांश उपयोगकर्ताओं के लिए समझ में आता है, खासकर अगर:
- आपका कंप्यूटर कुछ साल पुराना है।
- आप अपने पीसी के लिए फ्लैश स्टोरेज में निवेश करने में रुचि रखते हैं।
- आपकी हार्ड ड्राइव लगातार 80 प्रतिशत से अधिक पूर्ण है।
आइए इन विकल्पों में से प्रत्येक को अधिक विस्तार से चर्चा करें। सबसे पहले, यदि आपका कंप्यूटर अब कुछ साल पुराना है, तो संभवतः यह मशीन डिस्क-आधारित ड्राइव का उपयोग कर रही है। ये डिस्क ड्राइव उनके फ़्लैश-आधारित समकक्षों से सस्ता हैं, लेकिन वे बहुत धीमी हैं, जिससे आपके पीसी को धीमे स्टार्टअप समय और लंबे समय तक लोड होने का कारण बनता है। डिस्क-आधारित हार्ड ड्राइव आमतौर पर डिस्क की गति से रेट किए जाते हैं, अधिकांश आधुनिक ड्राइव या तो 5400 आरपीएम या 7200 आरपीएम पर रेट किए जाते हैं। हालांकि धीमी और अधिक आम 5400 की तुलना में 7200 आरपीएम ड्राइव होना बेहतर है, इनमें से कोई भी ड्राइव पूरी तरह से एसएसडी तक खड़ी नहीं हो सकती है, जो फ्लैश-आधारित स्टोरेज का उपयोग आपके स्मार्टफोन की तरह पहले से कहीं अधिक तेज़ी से जानकारी प्राप्त करने के लिए करती है, जबकि स्टार्टअप को कम करना और सेकंड को सेकंड को पुनरारंभ करना। एक नई हार्ड ड्राइव को अपग्रेड या खरीदने का दूसरा कारण आपकी स्टोरेज क्षमता पर आधारित है। यदि आप लगातार अपने हार्ड ड्राइव की पूर्ण क्षमता के खिलाफ दबाव डाल रहे हैं, तो आपके पास विखंडित फ़ाइलों का अनुभव करने का एक बड़ा मौका होगा, जिससे आपके कंप्यूटर को धीमा कर दिया जाएगा क्योंकि यह विशिष्ट सामग्री की तलाश में स्टोरेज की आपकी संपूर्ण लाइब्रेरी के माध्यम से खोज करता है। उच्च क्षमता वाले ड्राइव का उपयोग करने से खंडित फ़ाइलों की आवश्यकता को खत्म करने में मदद मिलेगी, और आम तौर पर आपके डिवाइस को तेज़ी से बढ़ाया जाएगा।

यदि आप अपने कंप्यूटर की हार्ड ड्राइव को अपग्रेड करना चाहते हैं, तो आप दोनों पर विचार करना चाहेंगे कि आपके पास किस प्रकार का कंप्यूटर है (डेस्कटॉप, लैपटॉप, इत्यादि), और हार्ड ड्राइव की कक्षा जिसे आप चाहते हैं। कंप्यूटर के लिए भंडारण की कुछ अलग किस्में हैं, इसलिए यहां आपको विचार करने की आवश्यकता होगी:
- हार्ड डिस्क ड्राइव (एचडीडी): यह पारंपरिक डिस्क-आधारित स्टोरेज ड्राइव है जो अधिकांश कंप्यूटरों ने समय के साथ उपयोग किया है। वे विभिन्न उपकरणों के लिए कुछ अलग-अलग आकार में आते हैं, और आपके डिवाइस पर नया संग्रहण जोड़ने के लिए अब तक का सबसे सस्ता विकल्प है। जैसा कि बताया गया है, निश्चित रूप से, डिस्क-आधारित स्टोरेज का उपयोग करने में समस्या तेज हो जाती है। यदि आप अपने कंप्यूटर का आधुनिकीकरण करना चाहते हैं और वास्तव में डिवाइस को तेज़ी से महसूस करना चाहते हैं, तो आप एचडीडी का उपयोग करके छोड़ना चाहेंगे। उस ने कहा, यदि आप केवल सादे भंडारण को जोड़ना चाहते हैं, या आप एक मानक एसएसडी के साथ एक अच्छी जोड़ी चाहते हैं, तो मानक हार्ड ड्राइव का उपयोग करके अपनी अतिरिक्त फाइलें या गेम रखने के लिए एक बेहतरीन जगह है।
- सॉलिड स्टेट ड्राइव (एसएसडी): एसएसडी इन दिनों सभी क्रोध हैं, और यह देखना आसान है कि क्यों। पारंपरिक डिस्क-आधारित हार्ड ड्राइव के विपरीत, एसएसडी भागों को घुमाने के बिना एकीकृत सर्किट का उपयोग करते हैं, आमतौर पर आपके स्मार्टफोन या टैबलेट के समान एनएएनडी-आधारित फ्लैश स्टोरेज का उपयोग करते हैं। टुकड़ों को घुमाने के बिना, एसएसडी को आम तौर पर अधिक भरोसेमंद माना जाता है, और जैसे ही आप ड्राइव का उपयोग करना शुरू करते हैं, गति वृद्धि उल्लेखनीय होती है। ये ड्राइव कीमत में धीरे-धीरे गिर रही हैं, लेकिन वे आमतौर पर अपने डिस्क-आधारित समकक्षों की तुलना में अधिक महंगे हैं। वे भी एक ही भंडारण की पेशकश नहीं करते हैं; एक टेराबाइट एचडीडी आपको $ 100 से कम चलाएगा, लेकिन एक टेराबाइट एसएसडी उस तकनीक को इस्तेमाल होने वाली तकनीक के आधार पर लगभग $ 300 तक बढ़ा देगा।
- हाइब्रिड ड्राइव (एसएसएचडी): हाइब्रिड ड्राइव ठीक वही हैं जो वे ध्वनि की तरह हैं: ओएस बूट ड्राइव और कभी-कभी फाइलों को लोड करने के लिए पारंपरिक ठोस-आधारित हार्ड ड्राइव के साथ पारंपरिक डिस्क-आधारित हार्ड ड्राइव। एचडीडी से अपेक्षित भंडारण की सामान्य मात्रा को बनाए रखने के दौरान हाइब्रिड ड्राइव एक सभ्य गति वृद्धि की तलाश में किसी के लिए एक अच्छी पसंद है। ये एक एसएसडी के रूप में अपग्रेड के लगभग उतने ही महान नहीं हैं (और वास्तव में, आप अपने डेस्कटॉप के अंदर एक एचडीडी और एसएसडी के संयोजन से बेहतर संयोजन तक पहुंचने में सक्षम हो सकते हैं), लेकिन किसी भी बजट के लिए, यह एक बेहतर विकल्प है एक मानक हार्ड ड्राइव।
- एम 2 एसएसडी: यह मानक एसएसडी का एक उपधारा है, लेकिन यह एक बहुत ही सरल कारण के लिए ध्यान देने योग्य है। चूंकि एम 2 एसएसडी पारंपरिक सैटा इनपुट को बाईपास करते हैं, इसलिए वे पीसीआई स्लॉट के समान एम 2 मानक का उपयोग करते हैं लेकिन बेहतर गति और छोटे आकार के साथ। ये, अब तक, इस सूची में सबसे महंगा अपग्रेड हैं। यह पता लगाने के लिए कि क्या आपका कंप्यूटर एम 2 ड्राइव का समर्थन करता है, आपको अपने लैपटॉप या मदरबोर्ड का शोध करना होगा, लेकिन यदि आप उन्हें बर्दाश्त कर सकते हैं, तो जैसे ही आप अपना नया हार्डवेयर इंस्टॉल कर लेंगे, आपको लाभ दिखाई देंगे।

एक बार जब आप अपना नया हार्डवेयर चुन लेते हैं, तो आपको इसे अपने डिवाइस में इंस्टॉल करना होगा। डेस्कटॉप उपयोगकर्ता आसान हो जाते हैं। अधिकांश आधुनिक मदरबोर्ड में एक से अधिक उपलब्ध सैटा पोर्ट हैं, इंटरफ़ेस हार्ड ड्राइव को मदरबोर्ड से कनेक्ट करने के लिए उपयोग किया जाता है। अपने ड्राइव को बदलना या अधिक संभावना है, डेस्कटॉप कंप्यूटर पर दूसरा ड्राइव जोड़ना अविश्वसनीय रूप से सरल है। हार्ड ड्राइव को जगह में पेंच करने के लिए अधिकांश डेस्कटॉप टावरों में बढ़ते ब्रैकेट होते हैं। यदि आप मानक 3.5 "आंतरिक हार्ड ड्राइव की तुलना में एक एसएसडी या छोटी हार्ड ड्राइव खरीदना चुनते हैं, तो आप कुछ रुपये के लिए अमेज़ॅन से एक सस्ते एडाप्टर ब्रैकेट चुन सकते हैं, जिससे आप अपने कंप्यूटर में ड्राइव को सुरक्षित रूप से माउंट कर सकते हैं। जब आपकी मशीन में ड्राइव को घुमाया गया है, तो यह एक प्लग-एंड-प्ले समाधान के रूप में आसान है। सुनिश्चित करें कि एसएटीए केबल आपके नए हार्ड ड्राइव से आपके मदरबोर्ड पर एक खुले सैटा बंदरगाह पर चल रही है, और हार्ड ड्राइव से आपके पीसी की बिजली की आपूर्ति में चलाने के लिए पावर कनेक्टर का उपयोग करें। आप यह सुनिश्चित करना चाहते हैं कि आपकी बिजली की आपूर्ति अतिरिक्त ड्राइव को संभालने के लिए पर्याप्त शक्तिशाली है, लेकिन अधिकांश भाग के लिए, आपको ठीक होना चाहिए। एक बार ऐसा करने के बाद, अपने डेस्कटॉप पीसी बैकअप को बूट करें और यह सुनिश्चित करने के लिए डिस्क प्रबंधन का उपयोग करें कि डिस्क कंप्यूटर द्वारा पहचाना जाता है। यदि आप पारंपरिक डिस्क-आधारित हार्ड ड्राइव जोड़ रहे हैं, तो आमतौर पर आप विंडोज एक्सप्लोरर के भीतर दोनों के बीच फ़ाइलों को स्थानांतरित करना चाहते हैं। एसएसडी में अपग्रेड करने वाले किसी भी व्यक्ति को अपने पुराने हार्ड ड्राइव से नए एसएसडी में विंडोज 10 के अपने विभाजन को स्थानांतरित करने पर विचार करना चाहिए। आम तौर पर, इस प्रक्रिया के माध्यम से आपको चलने के लिए आपके नए एसएसडी में कुछ प्रकार के स्थानांतरण सॉफ्टवेयर शामिल होंगे।

दुर्भाग्य से, लैपटॉप उपयोगकर्ताओं को ड्राइव जोड़ने या बदलने से पहले अपने निर्माता से जांच करनी होगी। अधिकांश पुराने विंडोज लैपटॉप में ड्राइव को बदलने के लिए कुछ क्षमताएं होती हैं, आमतौर पर या तो एक नया एसएसडी या 2.5 "लैपटॉप हार्ड ड्राइव के साथ। एसएसडी के साथ Ultrabooks जहाज मुख्य (और आमतौर पर केवल) ड्राइव के रूप में शामिल है, और दुर्भाग्यवश, जटिलता के बिना एक Ultrabook पर जोड़ने के लिए आप भाग्य से बाहर हैं। फिर, अपने लैपटॉप के ड्राइव को बदलने योग्य है या नहीं, इसके लिए अपने निर्माता से जांचें। अंत में, अधिकतर गेमिंग लैपटॉप आमतौर पर अतिरिक्त स्टोरेज के लिए अतिरिक्त स्लॉट के साथ उपयोगकर्ता-प्रतिस्थापन योग्य हार्ड ड्राइव के साथ शिप करते हैं। नए गेमिंग लैपटॉप में एम 2 एसएसडी के लिए रिक्त स्थान भी शामिल हो सकते हैं, जैसा ऊपर बताया गया है, गति, प्रदर्शन और आकार बढ़ाने के लिए SATA इंटरफ़ेस को बाईपास करें। स्टोरेज अपग्रेड की बात आती है, इस बीच टैबलेट और अन्य अल्ट्रा-पोर्टेबल डिवाइस, भाग्य से बाहर हैं। सरफेस प्रो 4 जैसे उपकरणों में मूल रूप से एसएसडी को प्रतिस्थापित करने की क्षमता थी (हालांकि मध्यम स्तर के कठिन और जानकारियों के साथ), लेकिन माइक्रोसॉफ्ट की नवीनतम 5 वीं पीढ़ी के भूतल प्रो ने उस विकल्प को दूर कर दिया।
समर्पित ग्राफिक्स कार्ड (जीपीयू)
आपके कंप्यूटर का प्रोसेसर आपके कंप्यूटर पर आपके द्वारा किए जाने वाले अधिकांश कार्यों को शक्ति देता है, लेकिन आपके ग्राफ़िक्स कार्ड (या GPU) को अनदेखा नहीं किया जाना चाहिए। अधिकतर उपयोगकर्ता एक एकीकृत जीपीयू (आमतौर पर इंटेल एचडी या इंटेल आईरिस ग्राफिक्स के रूप में जाना जाता है) से संतुष्ट होंगे, लेकिन जो कोई भी अपने कंप्यूटर पर फोटो या वीडियो को संपादित या संपादित करने की योजना बना सकता है, वह अपने डिवाइस के जीपीयू को अपग्रेड करना चाहता है। आपके कंप्यूटर के अंदर ग्राफिक्स कार्ड भारी कार्यों को करने में मदद कर सकता है कि सीपीयू अपने आप को संभालने के लिए बहुत कमजोर हो सकता है। इसी कारण से, यह महत्वपूर्ण है कि कंप्यूटर बनाने या खरीदने के दौरान अपने जीपीयू की ताकत को अनदेखा न करें, चाहे वह लैपटॉप या डेस्कटॉप हो।

अपने मौजूदा डेस्कटॉप पर एक ग्राफिक्स कार्ड का उन्नयन काफी सरल है। जैसे ही आपकी रैम के साथ, आपका ग्राफिक्स कार्ड बस आपके कंप्यूटर के मदरबोर्ड में स्लॉट करता है, जिससे इसे अपेक्षाकृत दर्द रहित प्रक्रिया मिलती है। उस ने कहा, अभी भी एक बहुत ही गंभीर प्रक्रिया है जिसे आपको अपने कंप्यूटर के जीपीयू को अपग्रेड करते समय पालन करने की आवश्यकता है, और यदि आप सावधान नहीं हैं, तो आप अपने मौजूदा घटकों को अधिक शक्तिशाली बना सकते हैं। समझने वाली पहली बात ये है: अपने कंप्यूटर के लिए एक नए-नए, टॉप-एंड जीपीयू को आधे दशक पुराने प्रोसेसर के साथ खरीदने से गेम पर बाधा प्रदर्शन होगा। अपने सीपीयू और जीपीयू दोनों के बीच संतुलन रखना महत्वपूर्ण है, और आपको अपने प्रदर्शन में सुधार के लिए कुछ सलाह के लिए नीचे प्रोसेसर को अपग्रेड करने के लिए हमारी मार्गदर्शिका देखना चाहिए।

यदि आपने निर्धारित किया है कि आपके प्रोसेसर का उपयोग करके आपके जीपीयू को बाधित नहीं किया जाएगा, तो आपको यह भी विचार करना होगा कि आपका नया ग्राफिक्स कार्ड आपके मदरबोर्ड और आपके कंप्यूटर की बिजली आपूर्ति द्वारा समर्थित है या नहीं। हम ऐसा करने के लिए पीसी पार्ट पिकर का उपयोग करने की सलाह देते हैं। सूची में अपने मौजूदा घटकों को दर्ज करें, फिर अपना नया ग्राफिक्स कार्ड जोड़ें और अपने पीसी संगतता जांच की जांच करें, जो अनुमान लगाएगा कि अब आपके घटकों को एक-दूसरे द्वारा समर्थित किया जाएगा या नहीं। यह एक आदर्श प्रणाली नहीं है, लेकिन यह सुनिश्चित करने का एक अच्छा तरीका है कि आपके डिवाइस अपग्रेड करने से पहले आपके डिवाइस एक साथ काम कर रहे हों। अंत में, एक बार जब आपका हाथ में नया जीपीयू हो, तो अपने नए जीपीयू (सिस्टम बंद होने के साथ) को स्थापित करने से पहले डिवाइस मैनेजर के अंदर अपने पुराने जीपीयू से ग्राफिक्स ड्राइवरों को अनइंस्टॉल करना सुनिश्चित करें। एक बार जब आप अपने कंप्यूटर में अपना नया ग्राफिक्स कार्ड डाल देते हैं, तो आपको अपने जीपीयू (लगभग हमेशा या तो एनवीडिया या एएमडी) के निर्माता से नए ड्राइवर स्थापित करना होगा।
यदि आप लैपटॉप का उपयोग कर रहे हैं, तो आपके GPU को अपग्रेड करने के लिए आपके पास विकल्पों का एक टन नहीं है। या तो आपका डिवाइस एकीकृत ग्राफिक्स का उपयोग करता है, या चेसिस के अंदर एक समर्पित समर्पित ग्राफिक्स कार्ड है जिसे अंतिम उपयोगकर्ताओं द्वारा प्रतिस्थापित नहीं किया जा सकता है। उस ने कहा, यदि आप थंडरबॉल्ट 3 का समर्थन करने वाले एक नए लैपटॉप का उपयोग कर रहे हैं, तो आप घर पर रहते हुए अपने गेमिंग या संपादन प्रदर्शन को बढ़ाने के लिए बाहरी जीपीयू का उपयोग कर सकते हैं। ये ईजीपीयू बाड़ों आमतौर पर कुछ सौ रुपये हैं, और यह आपके डिवाइस में उपयोग करने के लिए एक वास्तविक जीपीयू शामिल किए बिना है। ये मॉड्यूल आपके गेमिंग प्रदर्शन को किसी भी संख्या में Ultrabook और अन्य पतले और हल्के लैपटॉप पर बढ़ाने में लंबा सफर तय कर सकते हैं, और यहां तक कि मैकोज़ एएमडी प्रोसेसर का उपयोग करके ईजीपीयू का समर्थन करना शुरू कर रहा है (मैकबुक के लिए कोई आधिकारिक एनवीडिया समर्थन नहीं है)। फिर भी, इन उपकरणों के लिए बाजार युवा है, और यदि आपके लैपटॉप में थंडरबॉल्ट 3-संगत बंदरगाह नहीं है, तो संभवतः आप उस धन को एक अधिक शक्तिशाली कंप्यूटर की ओर रखने से बेहतर हो सकते हैं।
प्रोसेसर (सीपीयू)
यदि आप लैपटॉप का उपयोग कर रहे हैं, तो यह अनुभाग आपके लिए नहीं है। रैम और हार्ड ड्राइव के विपरीत, कोई लैपटॉप नहीं है जिसमें आसानी से बदलने योग्य प्रोसेसर होता है। And while the graphics card market at least offers the ability to use external graphics cards in a housing using modern IO for connections, there's no way to power an external CPU. Even prebuilt desktop users might find it difficult to replace the CPU in their computer without some intermediate-to-advanced knowledge, so replacing your processor might an option only for those who have the technical know-how to built their own computer in the first place.

That said, it's important to know what to look for in modern processors. The majority of computers sold today are powered by Intel CPUs, and though lower-end PCs and Chromebooks typically use Intel Celeron processors, most computers on the market use Intel Core i-series processors, typically designated with either Core i3, i5, or i7 (ranging from the weakest to strongest). Desktop and laptop PCs have different processor models, despite sharing the same Core branding from intel, meaning a desktop-class i7 is typically faster and more powerful than the desktop class i7 (the same is true with GPUs, though that gap is starting to close as mobile GPUs finally grow more popular). A laptop using a Core i7 processor should still be able to perform most powerful tasks, including video production and gaming on the go (assuming a dedicated GPU is used in conjunction with the CPU). The Core branding has also been around for several years, currently in its seventh generation. Each generation has included changes and increases in performance, some major and some minor, along with improved battery consumption.

All of this said, if you're looking at replacing your CPU, you're probably looking to rebuild your entire desktop. Typically, buying a new CPU also means buying a new motherboard to set that CPU on, since different motherboards have different pin sizes for different processors. It's tough to recommend a general processor for anyone looking to get into the world of building PCs, but here's a general rule: Intel's Core i5 is incredibly solid performance for the price, though power users will want to jump for the i7 line offered by Intel. AMD's new Ryzen line is the first time in years the company has produced CPUs under a new architecture, and they're also great for the money, often performing at similar levels to the Intel line without demanding as much cash. Buying a CPU can be a daunting task, but if you'd rather save as much cash as possible, using existing parts from your computer (the tower, the RAM, etc.) and buying new pieces like a brand-new CPU or GPU can really go far in saving you some cash.
Windows 10 Tweaks
As with any computer or phone, there are a number of tweaks and changes you can make to your settings in order to speed up your PC. You'll want to try these one by one, using your computer as you would everyday in the process, in order to ensure that the tweaks you perform on your computer work correctly for you. This may take a while to work through, as you'll be testing your computer step by step, but if you make several changes at once and suddenly discover a critical error with your PC, it'll be much tougher to figure out what's causing your problems if you've recently enacted a number of dramatic changes on your PC. The first four categories in this lists are must-dos for anyone trying to speed up their computer, as they go a long way in solving errors and slowdowns caused by rogue applications and problematic setting changes. Everything after that can be considered optional depending on the apps and services you use. चलो अंदर गोता लगाएँ।
Remove Vendor Bloatware
When you purchase a computer from a major manufacturer that isn't marketed or sold directly by Microsoft, Windows 10 isn't the only software installed on your device. Each computer company makes deals with various software companies to include their products pre-installed on your device. This can be everything from antivirus software that includes a “free trial” like Norton or McAfee software, to DVD-playing software like RealPlayer or PowerDVD. Some of this software can be useful, and if you find yourself using it on your PC, there's no need to remove it. That said, some manufacturers have a nasty habit of installing all sorts of apps and plugins on your PC that can cause you some serious headaches down the road. What's worst is that it isn't always immediately clear what software should and shouldn't be uninstalled from your device. Some of the apps, particularly those developed by your manufacturer, can typically add certain elements to your PC, including volume and brightness controls. That's why it's important to make sure you're uninstalling the correct software.

To do this, we'll be using “Should I Remove It?“, a website that is dedicated to helping Windows users determine the importance and utility of the software installed on your PC. Should I Remove It has all sorts of rankings and lists designed to help make removing bloatware a whole lot easier. The homepage of their site has a ranking of worst-to-best manufacturers in terms of the average amount of apps installed on their devices. Toshiba is ranked dead last, with Acer and Asus both featuring the least amount of any bloatware on their PCs. Each of these brands allows you to view lists of the software included on their device, which helps make it easy to decide which ones stay and which ones go. Should I Remove It also has their own application, and while it might sound silly to install a piece of software when you're trying to uninstall apps from your computer, Should I Remove It actually makes the process much more streamlined than we've seen otherwise. The app is free, and displays the rankings of each piece of software on your computer. If you don't want to use the app, you can also stick to using the website; it does the same thing but without a built-in uninstall link.

In order to start uninstalling apps, you'll need to open up the “Add or Remove Programs” option, either from your control panel or by pressing the Start button and typing “Add or Remove” until the suggested app comes up on your Start menu. This will open your settings menu and allow you to begin uninstalling applications from your device. You can search for specific applications by name, or you can scroll through an alphabetical list. Be careful not to uninstall anything you aren't familiar with, as some apps are needed to properly control your computer without error messages. For example, anything developed by Microsoft is typically a good app to keep on your device without removing it, but applications that are from unknown publishers are typically safe to uninstall. The easiest way to make sure you aren't removing important apps is to use Should I Remove It to search the name of your program; likewise, you can also Google the name of the app to ensure it's safe to remove from your device.
Removing programs from your computer can typically take a good chunk of your time, so make sure to set aside a couple hours to run through your full list of apps. Uninstall anything that you don't use or recognize, though make sure to cross-check your answers using the resources on the internet. Some apps may also require you to restart your computer, though in some cases you can hold off on doing this until you've uninstalled multiple apps. After you've removed your programs, take a day or two to use your computer as normal and feel it out. Make sure everything still works as intended and that you didn't uninstall any necessary software. Typically, apps that are required for general usage can be re-downloaded from your manufacturer's site.

Startup Files and Services
When you install a program on your computer, the installation guide may ask you to add the application as a startup program on your PC, which means it will automatically run once your computer boots. For some applications, like certain utilities or apps, this can be a good thing, helping you get to the program or application you need much faster than it would otherwise. For other programs, however, this can slow down your computer and drag the bootup process dramatically. Some apps, like Spotify or Steam, might seem like good applications to allow to boot up directly upon a restart, but if you don't use these apps everyday, it's a good idea to remove them from your startup manager.

The easiest way to disable these applications is through task manager, accessed by pressing Ctrl+Alt+Delete and selecting the task manager option from the list of settings. Alternatively, pressing Ctrl+Shift+Escape will automatically open the taskbar. Select the tab labeled Startup, which will load a list of applications designed to begin running when you boot your computer. This list will show you information about each of these selections, including their name, publisher, status, and even their startup impact. The status is the important part: each of these apps will either be disabled or enabled. If you see an app that's slowing down your computer (or a program you're unfamiliar with) that also happens to have startup enabled, that's an application that's prime for disabling. To disable each app, right-click on the selection and press the “Disable” selection. This won't stop the program from currently running on your computer, but it will cause the application to no longer run following your next reboot. If you find the app important to your daily computer use, you can also always use the same tab to re-enable these apps to run at startup.
Background Applications
Applications that run in the background in Windows 10 might be doing a lot more than you think. They could be updating sporadically, sending notifications to your device, looking and searching for content, and more. Not every background application is bad for your computer, but some users might find that their device runs smoother when there are less apps taking up your device's resources, particularly on older and less-powerful computers. Luckily, Windows 10 now has a way to automatically disable apps from running in the background on your device, and it's as easy as diving into the Privacy section of your settings menu. To do this, tap on the Start icon in the lower-left hand corner and type “Privacy, ” then hit enter. Scroll to the bottom of the left-hand list and begin deselecting applications you don't want to run in the background of your computer. These can be turned on and off as you see fit, and depending on your selection of installed applications, you should see a minor to major increase in performance by disabling some of the apps.

Browsers Extensions and Caches
Unless you spend most of your day working in a creative application like Adobe Photoshop or Premiere Pro, or an office application like Microsoft Excel, you likely spend much of your time on your computer using a browser to access your favorite sites. Since your internet browser is used for everything from checking up on your friends' lives with Facebook or Instagram to watching your favorite movies and television shows with Netflix and Hulu, it only makes sense that the browser becomes the most important tool in the arsenal of software on your PC. The internet is an incredibly powerful place, full of expression and art and news and analysis and media, making it a must-have utility in general when using your computer.

Every major browser used on Windows 10—Chrome, Firefox, and Microsoft Edge—also includes the ability to use extensions, or small pieces of software that plug into your browser and change the way it operates. Extensions are generally helpful tools, giving you the ability to modify how your computer works without having to worry about installing major pieces of software. If you look into the extensions menu of your browser, you'll see the full list of software you've added to your internet experience. This might be everything from a password manager like LastPass or 1Password, to a VPN plugin like NordVPN, to everyone's favorite extension to add, an ad-blocker. There are millions of different extensions on the web, and your browser developer will often do its best to gather those extensions into one place, like the Chrome Web Store or Firefox's Add-ons market.
Not every extension is your friend though, and if you aren't careful, you could accidentally add software to your laptop or desktop that could easily cause problems with your browsing. It's important to make sure that any software you don't remember adding to your device be removed, and any extensions that attempt to add themselves to your device, you stay far away from. Though there are plenty of unnecessary, spam-filled browser extensions on the web, the most important to stay away from—not to mention the ones you're most likely to run into—are search tool bars that take over your browser's default search engine and deliver you ads every time you open the browser. We'll have detailed instructions on how to remove extensions from each browser below.

Just as important as keeping track of your extensions, however, is the importance of ensuring that your browser's cache is routinely cleared to keep things running smooth and fast. Browser cache, like any cache in general, is the automatic storage of online data that you visit often enough that it becomes faster for your browser to save some of that data locally to access faster than anything you could ever achieve through your internet connection alone. For the most part, cache is a good thing. It takes up little room on your device and typically makes it so you can access your data without having to wait for an additional few second while your browser repeatedly reloads the same Facebook icon over and over again. Unfortunately, cache occasionally becomes a bit screwy, unsure of where the files are and greatly extending the general loading time for your content as you wait for your browser to give up on finding cache and simply reload the files from scratch. If your favorite web pages are taking a while to load, and you've noticed the “waiting for cache” error in the bottom corner of your browser, you likely need to clear and restart your cache to continue using the browser.
So, since both browser extensions and browser cache occupy the same space, let's dive into the settings menu and take a look at how to remove unwanted browser extensions and how to clear your cache inside the browser.
Chrome
To remove extensions inside of Chrome, select the triple-dotted menu icon in the top-right corner of your display. Roll your mouse icon over “More tools, ” then select “Extensions” to open the settings menu for your extensions. Here, you'll find a full list of the extensions added to your Chrome instance in alphabetical order. Scroll through this list of extensions and ensure that you have personally added every extension in the menu. You can check on the permissions granted to each extension by clicking on the “Details” icon, and you can enable or disable extensions by clicking the check mark icon on the side of each listing. If you find an extension worth deleting, click on the garbage can icon to remove it from your computer, browser, and Google account.

To clear your cache, tap on that same triple-dotted menu icon and select “Settings” from the menu. Once you've opened “Settings, ” scroll to the bottom of your page and open the advanced options, then select “Clear Browsing Data” at the bottom of the Privacy and Settings section. Alternately, you can also use the search section at the top of the page to search for “cache, ” which will load this option at the bottom of your list. Select this option, then select “Cached Files and Images, ” which will display the size of your browser cache in megabytes or gigabytes. You can also clear your download list or browser history in this menu; select the options you wish to remove, or leave it with just your cached data and hit the blue icon at the bottom of the menu. Once it's cleared, you may be prompted to restart your browser; you may want to manually restart your browser to ensure it properly clears. Make sure to right-click on the Chrome icon in your Windows 10 tray to completely close Chrome from running in the background.

Firefox
To view and remove any extensions on your device, begin by opening Firefox and selecting the triple-lined menu icon in the top-right corner of your display. Like Chrome, Firefox will give you a full list of menus, settings, and preferences available to change here. We need to select “Add-ons” from this menu, which will open both the Add-on store inside of Firefox and the ability to look at extensions installed inside of your browser. Select “Extensions” from the menu along the left-hand side of your display, which will load your full list of extensions plugged into Firefox. Selecting “More” will give you information like the publisher and the general idea behind what the extension is supposed to do; meanwhile, selecting “Disable” will stop the extension from running in your browser. Not every extension has the option to be removed completely from your browser, but if it does, you'll see the “Remove” icon there as well. You'll also want to dive into your plugins list, also accessible from the left side of the menu, to ensure you remove any other software running in the background of your browser.

To clear your cache in Firefox, head back to the triple-lined menu icon in the top-right corner of your display and select “Options.” Type “Cache” into the search box at the top of the display and wait for the full list to load, then select “Clear Now, ” listed to the right of the menu. This will automatically dump the cache created by Firefox inside your browser, and you'll be able to browse the web again freely, all while rebuilding your cache allocation.

Microsoft Edge
Edge has become a much more powerful browser over its last few iterations and updates, adding support for extensions and other plugins and generally making the app a bit more friendly and easy to use. To check out your installed extensions, open Edge on your computer and tap on the horizontal-dotted menu icon in the upper-right hand corner of your display. Once you've opened the extension menu, you can clear out what you do and don't need from Edge, disabling and removing extensions as you see fit. To manage your cache, you'll need to tap on that settings icon again, select Settings at the bottom of the menu, and tap on the “Choose What to Clear” icon under “Clear Browsing Data.” From here, you can choose to remove your browsing history, your cookies, saved passwords, and anything else you wish to delete from Edge; most importantly, of course, is the cached data and files. Remove those from your browser, and restart Edge to test for improvements.

Disable Animations and Other Visual Effects
On lower-end PCs, you may want to consider disabling some of the flashier visual effects provided by Windows. Since the launch of Windows Vista over a decade ago, Microsoft has made good use of animations, transparent icons, and formerly, a design technique called Windows Aero. Though Aero was replaced by “Metro design” (an unofficial title after Microsoft was contacted in relation to the name trademark, though some of these reports remain unconfirmed by Microsoft), transparency and animation have remained a staple of design in Windows, and as flashy as Windows 10 can be, it's important to remember that these effects can really tank your system's performances if you're running on low-end hardware. These effects can really push your processor to the edge, disallowing it from being able to do some of the other important tasks of your computer and making everything feel far slower than it is. Even on faster computers, the time it takes for your laptop or desktop to perform the animation can eat up valuable time throughout your day if you're always working on your computer.

There's a few things you should tweak in order to fix the experience of using Windows 10. The first thing to do is to dive into the Personalization menu inside of your Settings in Windows 10. Open up the Settings menu on your device, or type Personalization into the Windows menu to load the Themes and Related Settings list. On the side of the menu, you'll find a list of changeable settings and menu options. Select Colors the second from the top, and scroll to the bottom of the page. Changing the color of your Windows 10 device won't slow down your processor, but the transparency effects that may or may not be enabled there will. If your transparency is on, flip it off to disable all transparency options on your device. The tops of your menus and windows will no longer be transparent, but beyond a visual change, it may help ease the load on your processor.

Hit home in the Settings menu and head into Ease of Access. These accessibility options allow you to change how your device works, making it more or less comforting for your level of accessibility depending on your own personal needs. This setting is quick and easy to change: on the left menu, hit Other Options, and at the top of this menu, disable and uncheck “Play Animations in Windows.” This will completely stop all animations in Windows 10, so that gestures are completed in a single frame as opposed to showing the movement of your windows around the display. It's a lot less flashy, but at the same time, it's also a bit more enjoyable if you're looking to get a good sense of overall speed. Even more importantly, however, is the load this will take off of your processor. Seriously, not only will everything load and feel faster as you move around your computer, but just in general, your processor will thank you. If you want, you can also disable your background image here, instead simply showing a black screen.
One final setting to change, this time in the Advanced System settings menu found on your device. To open this, close out of the normal settings menu and press the Windows key on your keyboard. Type “con” into your menu and hit Enter, which will open Control Panel quickly. Select System and Security from this menu, then select System to view your system information. On the left-side menu, you'll see the option for Advanced System Settings. Tap on this to load a pop-up menu displaying your system preferences. Ensure the Advanced tab is selected, and at the top of this menu, you'll see the option for Performance. Finally, click on the Settings menu to load your performance options.

By default, this menu is set to allow Windows to pick the best options for your computer, but it's easy to adjust for bost the best performance and the best appearance. What you want to do here really depends on your preferences. If you want to simply allow Windows to adjust for best performance, select that option. Everything that's checked in the options menu below will automatically be unchecked. You can leave it at that if you wish, but alternately, we suggest looking through the list of settings and options to ensure there isn't anything that needs to be selected. Checking a box will switch your mode to custom, but that's fine for our purposes. If you're running on a powerful computer, you can select “Adjust for Best Appearance” to automatically check every option. Once you've selected the options you want to keep, click Apply and OK to close the menu.
Virtual Memory Settings
Virtual memory is one of the most important aspects of your computer, even if you're relatively unfamiliar with the term. It's also important to ensuring that your data is able to be loaded quickly at a low cost to users. While your RAM handles your computer's memory to keep apps open and active in the background (and ready to be launched quickly), virtual memory allows your hard drive or solid-state drive to be used as memory if your system runs short on RAM. If upgrading your RAM isn't an option due to your computer's upgradability or due to pure cost of purchasing more memory, you might want to check your virtual memory settings to ensure you're giving your device as much wiggle room as you can.

To check out your virtual memory settings, tap on the Start icon in the bottom-left corner of your display and type “Control” on your device to open the Control Panel. From the main menu of the Control Panel, select “System and Security, ” then select “System” from this list. On the left-side panel of your display, you'll see the options to select “Advanced System Settings.” Click this and accept the security prompt if one appears. This menu has a ton of information, but you'll want to select “Advanced, ” then “Performance Settings” and “Advanced” once more. This menu has your options for your virtual memory settings, and you can tap on “Change…” to edit the amount given to your device.

When the “Change” window opens, you'll need to uncheck “Automatically manage paging file size for all drives” to manually edit the amount of virtual memory allows by your device. At the bottom of this window is a section that alerts you to the currently-allocated amount of memory, along with the recommended amount for your computer. In most cases, you can choose to allocate this recommended amount, which should increase the performance of your device.

To do this, once you've unchecked “Automatically manage paging file size for all drives, ” you can change your selected setting from “System managed size” to “Custom size.” Set your initial size and the maximum size as the amount recommended by your device, which will cause your computer to always leave that amount (in megabytes) open on your computer. Finally, also ensure that the location of your swap file is located on the fastest drive in your computer (if you have multiple drives; otherwise, this step isn't for you). If your C: drive is an SSD and your D: drive is a traditional hard drive, make sure the C: drive is the location of your virtual memory to ensure your computer is set to be speedy.

Power Settings
If you're running a laptop, you might want to check out your power settings to ensure they're set to the best options for you. While lowering your power settings on your laptop can help your computer last longer when on the go, it also reduces the performance of your device. If your laptop is plugged in, Windows will typically increase the performance of your device automatically. Likewise, if your laptop has a dedicated graphics card (like a GTX 1060 or GTX 1070 in NVidia's Max-Q laptops), it will automatically switch on when you plug your device in, thus increasing the power of your computer. The newest updates to Windows 10 have made updating your power settings incredible easy, so don't stress too much about having to dive into your settings every time you want to control your power.

To control your power settings using the shortcut in the Windows taskbar, look for the battery icon in the lower-left corner of your display. Clicking on the battery icon will load your quick settings menu for your power options. When you're plugged in, you'll have a slider with three options for your power performance: Better Battery, Better Performance, and Best Performance. You'll also be able to see how long until your device is fully charged.

When you unplug your device, you're given an extra option on the included slider, allowing you to select from the first three options listed above or, if you wish, to select the option to the far left: Battery Saver. Putting your device in Battery Saver mode will automatically dim your display and reduce your performance even farther than the Better Battery option, but if you're on a plane or away from a power source, it may be a good option to help keep your computer running faster.

To get the full list of battery options on your computer, open the shortcut on your laptop using the battery icon in your taskbar and select “Battery settings, ” which will open a Settings menu on your computer. Here you can see a full overview of your battery stats, from the time remaining on your device to the battery usage by application, to the ability to automatically turn on Battery Saver mode once your battery percentage hits a certain threshold. Windows allows you to review some battery-saving tips from within the settings menu, and you can even change the battery settings for playing back video on your device.

One final step before we move on from power settings: tap on the Start icon in the bottom-left corner of your display and type “Control” to open the Control Panel. Select “Hardware and Sound, ” then select “Power Options.” The Control Panel version of the Power menu has far more options than the basic settings menu, so it's important to know this menu exists. You can manually change your power plan settings here (including options for when your display turns off and when your computer finally puts itself to sleep), and if you select “Advanced Power Options, ” you can fine-tune every aspect of your computer and its power draw, maxing or minimizing as you see fit.

Most people will be good to go just by adjusting the basic power options in the shortcut through your taskbar, but if you're looking for a way to edit the PCI Express power options or when your USB plugs suspend power, the Advanced Power option is a great way to truly take control of your device. That said, if you adjust options in here and notice your computer acting odd, make sure to change your power settings back to default.
Search Indexing
Search indexing can be a powerful tool in the right hands, used to increase the speed of your searches and to make everything a little bit faster on your PC. If you have a large library of files on an older, disk-based hard drive, it can take a long time to find files using the search built into Explorer and the Start menu on your PC. Search indexing helps to make all of this a little bit faster by indexing files in the background. If you have an older computer with a slow processor, however, you may want to turn it off—especially if you don't do a lot of full-scale searches for content on your PC. People who search for files frequently may want to leave the option enabled, but whichever you choose, you'll be happy to know you're helping to speed up your PC in some way or another.
To open search indexing, click on the Start icon in the bottom of the screen and type “Index” to load Indexing Options, then hit enter to open. Your indexing locations will be listed in the white portion of the menu, and you can edit or add options as you see fit. The “Modify” icon opens a window where you can select and deselect locations that have been indexed, though if the menu looks complicated to you, you're better off either turning off indexing all together or leaving it on for good.

एक अभियान
One of the major features of Windows 10 is Microsoft's integration with OneDrive, the company's cloud storage and file hosting service that competes actively with Dropbox and Google Drive. While both of those competing services do allow for some straightforward desktop integration, nothing is quite as in sync with Windows as OneDrive, thanks to the synergy between Microsoft's cloud storage service and its operating system. The service runs in the background actively to sync your files to the storage allocated to your account, but if you aren't using it, OneDrive might just be eating up processing power you could use on something else. Turning off OneDrive isn't too difficult, though disabling it altogether is a different story.

If you're just looking to disable OneDrive, it's pretty straightforward, Click on the ^ icon in your taskbar near the clock in the bottom-right corner of the display and look for the cloud icon. Right-click on this icon and select “Exit” or “Quit OneDrive, ” depending on the version of the app, to close out of the service. OneDrive will warn you your files will no longer be kept in sync with the service from your computer, and you can click through the prompt to finish quitting the system. You can and should also select the settings option here, which will allow you to disable OneDrive from starting on your computer automatically upon signing into Windows.

For most people, this should be enough to stop using OneDrive altogether; it won't run in the background of your computer, and you can stop worrying about using up your computer's processing power with worthless tasks you don't need or use. However, there's another option. If you feel comfortable enough editing the registry of your computer, you can completely disable OneDrive through your computer's settings manually. Open Regedit by typing it into the Start menu, then go to the following key: “HKEY_LOCAL_MACHINE\SOFTWARE\Policies\Microsoft\Windows”. Create a new key here named One Drive, and give the key a DWORD called DisableFileSyncNGSC with a value of 1. This will completely disable the option to sync content on your computer through OneDrive, though you can always return to this key to edit and remove it.
Startup
Your computer should have a password on it for security and protection, especially if you live with other people, keep important documents like tax information on your hard drive, or carry your computer with you to work everyday. However, if you really have no interest in protecting your laptop, you can disable Windows 10's requirement that you keep a password on your device by using the Run dialog we've used throughout this guide. To do it, press Win+R on your device to open Run and type “netplwiz” into the dialog box. This will open the User Accounts display on your computer, which shows every user account on your device. If you have a shared device with multiple accounts, we highly suggest not using this method to unprotect your data.

Select your account name and highlight it using your mouse, then uncheck “Users must enter a name and password to use this computer” to remove the need for a password for your device. This will speed up your login process, thereby getting you access to your documents that much faster over the course of a normal day of use.
However, even if you don't want to remove your password and security options from your device, you can still manage to save some serious time on your startup process by enabling Windows Fast Startup. This is one of the most important options you can select in Windows to improve boot times, yet Microsoft leaves it off by default for most users. Basically, the option allows for Windows to create something called a hiberfile, a document that holds information on the most-recent image of your saved kernels and drivers from your RAM instead of dumping everything at the end of a session. When you start your computer the next day, Windows will use the info from that hiberfile to load your information faster.
It should be noted that enabling Fast Startup means your computer doesn't fully power down. Using Fast Startup puts your device into a deep hibernation. For most users, this is effectively the same as powering down the device; you'll never be able to tell your computer isn't in a zero-power mode, and it's different than using the standard hibernation mode you can activate from your Start menu in Windows. There are some minor power concerns for some folks, but most people will find no difference between the two options.

To activate Fast Startup or ensure it's been enabled, hit the Start icon and type “command” to search for command prompt. Right-click on the option and select “Run as admin” to open your command prompt. Then enter this command: powercfg /hibernate on
Close out of the command prompt and open your start menu and type “power, ” then hit enter. You'll see your Power options open on your device. Select “choose what the power button does” and then select “change options that are currently unavailable.” Make sure the checkbox for “Turn on Fast Startup” is enabled, then save your changes on the device. We should note that anyone running 2017's Fall Creators update should already have this enabled, but those on older devices will want to make sure this has been selected manually.
Shutdown
Just like startup, it's worth taking a look at your shutdown habits to make sure your process of turning off your device is as fast as it can be. There's two ways to do this, and our first suggestion is to ensure that the power button on your device is set to do what you want it to do. This can be controlled within Control Panel, and it's worth making sure you have the power button on your device set to do whatever speeds up your process the most.
To do it, search “Power” in the Windows menu and hit enter to open Settings. On the right-side of the menu, find “Additional power settings” to open Control Panel, then use the left-side of that menu to select “Choose what the power buttons do.” This will open a new menu that allows you to control what the power button does on your device. Some computers, including mostly laptops, have power and sleep buttons built into their hardware, which allow for the ability to control power and sleep. Other computers, especially laptops, typically only have one physical power button, but may have a function key that doubles as a sleep button.

You can control what both of these buttons do depending on your needs, which is great for anyone looking to command their laptop with effort. Both buttons have the following options:
- कुछ मत करो
- Sleep
- Hibernate
- Shutdown
- Turn off the display (this may depend on your hardware)
On desktops, as seen in the screenshot above, most computers keep things pretty basic. Laptops have much more flexibility when it comes to this. With a laptop, you get three options, including the ability to use the power button, sleep button, and to close the lid. Each of these also have options to control what happens when running on battery and when plugged in; for example, if you work on your laptop and wish to leave it running in normal mode with the display closed while it's powered, you can tell your laptop to do nothing when the lid is closed. Likewise, if you prefer to turn your computer off any time the laptop is closed, Windows can automatically power your laptop off just by closing the display.

If you're still looking to save some time in powering off your device, you can create a shortcut on your desktop that auto-powers off your laptop or desktop. To create it, right-click on an empty section of desktop and select “New” from the contextual menu. Select shortcut, and type the following in the dialogue box that appears on your display, as seen in the above screenshot:
%windir%\System32\shutdown.exe /s /t 0
Click “Next” to name the shortcut, and hit finish. Once you hit the shortcut on your device, it'll automatically shut down, so be careful using it. Once you activate it, you're basically out of luck to stop the shortcut from powering off your device, leaving you unable to stop the process.
Folder Options
Windows Explorer has the option to change certain settings within your folders that can help give your computer a boost in performance when using folders. To access these settings, open Explorer and click View at the top of the interface. On the far-right of the interface, you'll find an Options drop-down menu, which allows you to either change certain options or open a dialogue window. Click the options key to open the window, then select the View tab from this list.

Within this options menu, you'll see a ton of information as it regards to displaying files, folders, drivers, and more. By disabling some of these options, you can speed up the visual aspect of File Explorer in order to make everything loads in File Explorer as quickly as possible. You don't need (or want) to uncheck all of them, but these are a few of the options you should disable as soon as possible:
- Display file size information in folder tips
- Hide empty drives
- Hide extensions for known file types (it is also a good security measure to disable this)
- Show encrypted or compressed NTFS files in color
- Show pop-up description for folder and desktop items

Sound Notifications
Disabling notifications sound won't really save you all that much time in the long run, but it can help if your computer doesn't have or need speakers and you're looking to disable the processing power that is pushed every time a notification goes off. To disable sound notifications, click on the Start Menu in the lower-left hand corner and type Control Panel into Start before hitting enter. Once you've opened control panel, select Sound and enter the Sounds tab. From here, you can disable all the sounds that don't require playback on your device by unclicking the speaker icon to the left of each program even. If you want, you can also enable “No Sounds” at the bottom of Sound Scheme, which disables all sounds at once. 
Privacy Settings
No, we aren't going to tell you to disable specific privacy settings. Instead, we think it's a good idea to disable the option for Windows to collect and send data from your computer to their custom logs, which helps identify bugs, crashes, and uses of Windows. This data is anonymized, so leaving it on doesn't necessarily hurt your privacy. Instead, you should turn it off if you want your computer to use less resources sending data to Microsoft's centers.

To do this, click on the Start Menu in the lower-left hand corner and type “Privacy” to open your privacy settings. From here, you can choose which options to leave enabled and which options to leave disabled, depending on your needs and what you want Microsoft to receive from you, data-wise. For example, you may want to disable your advertising ID choice, but leave “suggested options” enabled in your settings menu. What you change here is really up to you as the user in the long run.
Tips and Notifications
Windows 10 comes with a series of tips for letting you know how to best use the operating system. These are great for beginners, but if you've been using Windows 10 for years, you're likely going to find you don't need these notifications on to learn how to use the OS. These tips and other notifications that attempt to highlight apps or help you to discover how to perform specific actions in Windows can really bog down your computer, or just turn your device into a frustrating experience. If you're over having to deal with these notifications, you can turn these off right inside the Settings menu.

To do so, head into Settings from the Start Menu and select “System” from the list of options. You'll see the settings panel load a long list of options and selections you can pick from in order to change the options in your Windows menu. Select “Notifications and actions” from the left side, three or four options down from the top. From this option, you can actually turn on or off multiple notifications options, including the ability to get notifications from apps and other senders (turn this one off), and to get tips, tricks, and suggestions as you use Windows (turn this off as well). With all three of these off and disabled, you'll have a much better experience using Windows, especially if you're already a pro-level Windows user.
Trim the Start Menu
The Start Menu in Windows 10 made a roaring comeback after being gone from Windows 8, and thanks to the improvements made in the menu, it's more powerful than ever. That said, if you're looking for a way to slim down Windows and make it easier to use, keeping the Start Menu in its current state is not the right way to go. When you first boot up Windows 10, the Start Menu is filled with things that you simply do not need to work properly on your computer. News, weather, and other rotating shortcuts take up much of the room on your Start Menu, and load content in the background of your device, slowing things down and making it much harder to work on your computer if you're using low-end specs.
You can take the time to customize your Start Menu, but if you just want to keep things clean and simple without any complications, you can open up your settings menu to change the options for your Start Menu personally. Open up Start and select Settings from the options in the menu, then select Personalization from the actual menu. Personalization allows you to change all sorts of options within your computer, from the background of your computer to the lock screen wallpaper. From this menu, select Start, second from the bottom on the left-side panel of the menu.

Here, you can quickly customize your settings menu to change it to whatever works best for both your personal computer and your own workflow. If you're looking for the most basic version of the Start Menu you could possibly have, start by disabling “Show more tiles, ” “Show suggestions occasionally in Start, ” and Use Start full screen.” The first option extends your Start Menu farther than it necessarily needs to, the second option places suggestions and ads for apps from the Microsoft Store in your Start menu, and the third option creates a full screen Start Menu experience, similar to Windows 8 and Windows 8.1.
If you want to go farther, you can disable “Show most used apps, ” which displays a list of six or seven suggested apps at the top of the Start Menu when you open it, and “Show recently added apps, ” which highlights apps and programs you've recently installed on your device. We don't recommend disabling the option to show your app list in Start, however, because that's the basic purpose of the utility to begin with.

Once you've finished in the Settings menu, make sure to head into your Start Menu itself to ensure that everything is laid out how you would want it to be. You can also further disable live tiles and other content here, including removing content like the weather and news from your Start Menu to ensure that your computer is loading as fast as it can, without taking up background processes.
Set Active Hours
This one is important. Thanks to Windows' new updating system, you're going to want to make sure that you've set your Active Hours correctly, or else you may end up losing hours of work or progress towards updating your content. Trust us—we speak from experience. Active hours can extend up to eighteen hours, so make sure that you've set yours properly to ensure your work is covered. To change your active hours, open up the Settings menu from Start and select “Update and Security, ” or search for “Active Hours” in the search box. Under Windows Update, find the option to change your Active Hours.

Windows used to limit you to a twelve hour window for this option, but newer features within Active Hours now allow you to extend your time out to eighteen hours. You should absolutely take advantage of this, especially if you're someone who finds it hard to maintain specific work hours or who always seems to be using their computer for work, school, and play. To set your active hours, you should begin by setting whatever the first time you work in a day is (6am, 8am, 10am, etc.) and go as far into the night as you typically work. With the eighteen hour limit, you can possibly extend your hours up to midnight for a workday that starts at 6am, and 4am for a day that starts at 10am. Pick the hours that are right for you.
Mouse Responsiveness
If you are impatient waiting for the mouse to show menus when you hover over an item, you can change the delay time in the registry. In the Registry Editor, find the following keys. They are set to 400 milliseconds, or 4 tenths of a second, by default. You can make them pretty much instantaneous by changing the values to 10.
- HKEY_CURRENT_USER > Control Panel > Mouse
- HKEY_CURRENT_USER > Control Panel > Desktop
Maintenance Items
In older versions of Windows, we had to pay attention to these items frequently. Today we only have to look at them infrequently, after a lot of use and many cycles of adding and deleting programs and files. You can go a long time without paying attention to these items–maybe just once a year.
Temporary Files
This is the one you may need to do most often. If the temp files folder gets too large (in the multi-gigabyte range) system performance could suffer. You can manage this through the Disk Cleanup feature of Windows. Open a File Explorer window from the Task bar and select This PC on the left. Right-click on the C: drive and select Properties. The Disk Cleanup button will be in the window that appears next. Click this and follow the instructions.
Cleaner is a free third-party program that combines this and other maintenance tasks in one easy-to manage place.

Registry
The registry usually only needs to be cleaned after uninstalling programs. The uninstaller often misses some files and Registry settings. Revo Uninstaller does a better job. Ccleaner and JV Powertools have good registry cleaners that can catch any leftovers.
Defrag
Normal file operations on a disk drive result in bits of files written all over the hard drive wherever room is available. The more scattered, or fragmented, the files become, the longer it takes to read them.
Windows 10 does a good job of keeping fragmentation in check. You can check on the status of the drives and run a manual Optimization from the Tools tab of the C: drive's Properties box. Select the Optimize button on this tab to bring up the Optimize Drives window. Select a drive and hit Analyze to get the latest status. Hit Optimize if you want to defrag the drive.


Note that SSDs work differently and should not be defragged. Defragging is disabled for SSDs in Windows 10.
Disk Images and Clean Installs – A Closing Thought
If you have upgraded your computer from a previous version of Windows, it might be time do do a clean install. Describing the full process is beyond the scope of this article, but this process would clear out any problems that were carried over from the old system. It will take a lot of time to re-install all the apps you need, but it could be worthwhile to know that you are starting with the cleanest possible configuration.
If you do all the work of optimizing your system or a clean install, the ultimate cleaning/restoration tool is a complete disk image of a fully-cleaned system with all your programs installed and ready to run, along with a current backup of all of your data. After that, the next time your system gets to a point where it is slower or needs major cleaning, all you have to do is restore the image and then restore your data from a current backup.